Archive for the ‘General’ Category

New for 2020: Exmark 96-Inch Flex-Wing Lazer Z X-Series Mowers

Tuesday, February 4th, 2020

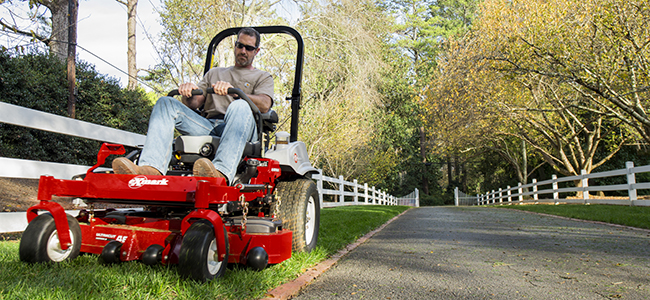
If you’ve got a lot of area to mow and want to cut it quickly and efficiently, you want a wide-area mower. And if you want superb cut quality, durability and operator comfort, you want a Lazer Z X-Series Now, you can have both, an Exmark Lazer Z X-Series with a 96-inch deck.  Landscape professionals can now get increased productivity in a gasoline powered mower, providing the productivity to finish jobs quickly and more profitably.

Productive – and Versatile

The 2020 96-inch Lazer Z X-Series can mow up to 9 acres per hour. It’s equipped with a 48-inch center deck and two 24” wing decks. Both wing decks flex up to 20 degrees up and 15 degrees down, minimizing scalping a letting you mow across a variety of terrain. The UltraCut Hydraulic lifts let you raise and lower the wing decks during trailering. Because we know trailer space is often at a premium for your crews, the mower fits on a trailer designed for a 72-inch mower.

The UltraCut flex-wing decks use four matching blades that deliver the signature Exmark cut quality. Matching blades make servicing the mower easier. A factory-installed mulch kit delivers unmatched mulching performance, and lets you mulch some, all or none of the clippings.

The 96-inch Lazer Z X-Series is a great solution for anyone mowing large, open space. Municipalities and park districts, universities, corporate campuses and large apartment complexes are good examples of areas that a wide area zero turn would be a good fit, as would large acreages and residential properties.

Enhanced Comfort for All-Day Operation

At Exmark, we believe comfort enhances productivity. Reduced exposure to bumps and vibration can increase operator comfort. Isolation mounds under the Lazer Z X-Series seat base provide three-dimensional isolation from vibration. The full-suspension operator seat provides all-day comfort thanks to Exmark’s scissor link ball-bearing suspension system, Elastomeric Vibration Control (EVC) stretch fabric base, and custom seat cushion foam.

Built for Durability and Longevity

Air-cooled Kohler EFI commercial engines power the 96-inch Lazer Z X-Series. Exmark engineers designed additional features to reduce operating temperatures, including an external oil cooler. An engine hood designed to screen intake air provides an ample supply of cool, clean air while reducing potential debris build-up around cooling fins.

Patented RED Technology works with the Kohler engine’s electronic governor, now utilizing an electronic throttle body (ETB), to virtually eliminate the governor lag associated with traditional mechanical governors. This increased responsiveness allows operation at a lower, more fuel-efficient RPM level without compromising productivity or cut quality. RED Technology constantly monitors machine health, delivering on-screen service alerts and productivity data to maximize uptime and encourage proper maintenance of the machine.

Optimized weight balance in chassis to provides stable, responsive handling in varied conditions. The chassis is constructed of formed, welded and fully reinforced 3/16” walled, high-strength tubular steel, with a cast engine cradle for ultimate long-term durability. Exmark’s unitized hydro pump and motors eliminate hoses to provide maximum efficiency and reliability in the field.

Interested in adding a 96-inch Lazer Z X-Series to your fleet? Talk to your local Exmark dealer.

New for 2020: Airless Tractus Tire and Wheel Combo

Thursday, January 9th, 2020
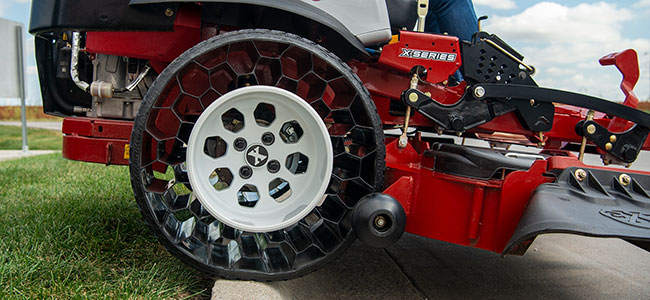
Airless Tractus Tire and Wheel Combo

At Exmark, we build mowers to make lawn maintenance easier and faster for pros and homeowners alike. We know that having to stop and deal with flat tires is more than a minor hassle. For pros, it’s a delay that makes the job take longer. For homeowners it can mean sacrificing your all too scarce free time to get it fixed. We wanted to eliminate flat tires entirely, so we set out on a multi-year development process that involved in-house and field testing. The result: Our new airless Tractus tire and wheel combo.

Exmark’s team found three critical improvements compared to pneumatic tires. Tractus tire and wheel combo do not go flat, meaning less downtime for commercial mowers, and less maintenance for homeowners.  

Tractus also provides a similar ride quality to traditional pneumatics tires but offers a longer service life. And while you’re mowing, they provide more consistent ground pressure with a larger contact patch. This reduces turf compaction and provides a better overall cut quality. And the unique tread design offers superior traction in a wide range of turf conditions.

Airless Tractus tire and wheel combos will be available on gasoline powered Lazer Z models beginning in early 2020. Interested in taking them for a test drive? See your local Exmark dealer.

Exmark’s New Augmented Reality App

Thursday, June 27th, 2019
2019 StarosAR Model Standing Lawnmower

There’s a new way to explore Staris, Exmark’s revolutionary stand-on zero-turn mower. With the Augmented Reality app, you can get a 3-D, in-depth look at the mower from the comfort of your couch, right now, rather than having to wait until you can get in to your local dealer.  

Download the app from the Google Play or Apple App Store. Once it’s installed on your device, print out the Staris marker and scan it. The app brings Staris to life in front of you. Use the buttons to explore features, look at components, and get a 360-degree view of the mower. Learn how Staris helps landscape professionals maximize performance – and profitability.

The 2019 Staris delivers increased stability and traction. And with this new app, you can experience the compact, optimized design, and explore all the innovative features that make this machine unique.

Watch the short video, below, to see how the app brings Staris to life, then head to your local Exmark Dealer when you’re ready to put one to work.

It’s Time for Spring Mower Maintenance

Tuesday, April 30th, 2019
Spring mower maintenance is essential for a great mowing season

If spring rains have suddenly made your lawn into a mess, it’s tempting to break out the mower and get it cut. But before you mow for the first time, it’s important to perform spring mower maintenance and do a safety check. Skipping it could mean costly repairs and could cause damage to your lawn.

First, do a visual check for problems, including wear and rust on cables, belts and brakes. Tighten any loose screws and bolts, and be sure that baggers and other add-on accessories are properly attached.  Check that handles on walk-behinds, and ROPS and seats on riding and zero-turn mowers, are in good condition and securely attached.

Next, perform basic spring maintenance. Replace any fluids or fuels left unused from last fall. Gas and fuels that have sat for months can degrade in quality, which makes the mower harder to start. Oil should be replaced, too, since dirt and other contaminants in the oil can cause engine damage. You should also replace filters, as dirty or clogged filters can lead to longer mow times and sluggish performance.

Clean your mower, especially if you didn’t clean it in the fall. Get rid of dirt and clippings inside and out. Use forced air rather than water to do this. A clean cutting deck provides improved air flow and capacity, which means improved performance and results.

Check the mower blades. Replace any that are nicked or cracked, and sharpen dull blades. Then be sure blades are straight and properly balanced. Unbalanced blades will cause ragged, uneven cutting, and knocking or excess vibration can damage your mower deck. Learn more about proper mower blade maintenance.

Finally, check the wheels. Look for permanent flat spots on tires, or worn and cracked tires, and replace these. For mowers with inflatable tires, check pressure and inflate as necessary.

Maintenance requirements vary from mower to mower. While we do our best to design mowers that require little maintenance, the needs of an Exmark walk-behind mower are different than those of an Exmark zero-turn. If you have questions about maintenance or would prefer to have a professional look over your mower, reach out to a service professional at your local Exmark dealer.

Learn How to Fertilize Your Lawn with Exmark’s Done In a Weekend Video Series

Friday, April 13th, 2018

If you don’t know how to fertilize your lawn properly, you are not alone. Many homeowners don’t fully understand the importance and role of regular fertilization for their lawn’s health, according to landscape designer Doug Scott of Redeem Your Ground in Atlanta, GA.

Fertilizing your lawn is important because it provides grasses and plants with the nutrition they need for healthy growth. Even in rich soil, plants will absorb and deplete the nutrients over time. Fertilizer restores those nutrients and helps keep your lawn lush and healthy.

In Exmark’s new Done-in-a-Weekend video Fertilizing 101, Scott explains, “All plants require six essential nutrients. Oxygen, carbon and hydrogen, which are received above the ground, through air and water, and nitrogen, phosphorus and potassium, what must be provided by the soil.” Those three essential nutrients are shown in the letters and numbers on fertilizer bags, which many homeowners find confusing.

“Every bag of plant food will contain three numbers, separated by dashes. These represent the three nutrients your plants rely on the soil to provide – nitrogen (N), phosphorus (P) and potassium (K), in that specific order.”

“A bag of fertilizer labeled ’11-7-7’ is made up of 11-percent nitrogen, seven-percent phosphorus and seven-percent potassium. The remaining 75-percent consists of inert fillers designed to help properly distribute the active ingredients without burning the lawn.”

There are a dizzying array of fertilizer combinations, but it’s easier to understand if you know what the principle nutrients do for plants.

Nitrogen (N) fosters leaf and vegetation development.

Phosphorous (P) aids root development and flower and fruit production.

Potassium (K) helps regulate water and nutrient absorption, and promotes disease resistance.

The type of fertilizer you use will depend on your lawn, shrubs and plants condition, your primary soil types, and the time of year. A good general fertilizer is one labeled 10-10-10: It has all three elements in equal proportions.

You’ll want to broadcast the fertilizer evenly over the area, then water thoroughly so plants can begin to take up the nutrients. Be careful not to over fertilize, as that can burn or damage lawns and plants.

Regular fertilizing with the right fertilizer will help you achieve the lush lawn and beautiful plantings of your dreams. Best of all, this is a low-key project that you can accomplish in a weekend.

Find more Done-in-a-Weekend projects to help transform you lawn.

Done in a Weekend Project: Get Fired Up

Thursday, June 22nd, 2017

Once the landscaping takes shape and you’re enjoying your outdoor living space, it’s a good idea to introduce enrichment projects. These small, weekend jobs transform your yard into a place where people want to gather—an extension of your home that enhances your square footage without any major building.

And one of the best ways to do this? A fire pit. No matter what the weather, a fire pit provides comfort and a place for the whole family to enjoy. In this Done-in-a-Weekend series project, we’ll look at what it takes to create a safe and beautiful space for your fire pit.

Before you do any kind of landscaping or work on a fire pit, make sure you find out what your local safety regulations are. There may be fire code restrictions or HOA considerations, so follow the rules and always make sure you update your homeowner’s insurance accordingly.

For the easiest approach to a fire pit, we suggest purchasing the pit and putting your focus on the environment. Here’s how:

  1. Choose a Location. The location should be at least ten feet from any structures or outbuildings. It should also include room for both the fire pit and seating around it.
  2. Mark the Space. In order to get the best results (around 15-18 feet in diameter), mark the space you’ll be clearing using careful measurements.
  3. Prep the Area. This includes removing debris, grass, dirt, and/or other items in the way and also leveling the ground.
  4. Build a Border. A stone border is a great way to transition from your yard to your fire pit space.
  5. Put Down Flooring. Go simple with rocks or stone. Class it up with brick or pavers. It all depends on the look you want and the amount of money you’re willing to invest.
  6. Place the Pit. Here’s where things start to get fun. Place and secure the pit in the center of the space, and you’re almost ready to go.

Decorate. Set up chairs and tables. Build decorative accents. Put in some potted plants or and other décor to put your personal touch on the fire pit patio.

The best part of weekend projects like building a fire pit is that you can enjoy it at the end of the weekend. Sit back, grab some marshmallows, and enjoy a great new place for the whole family to come together.

Done in a Weekend Project: Walk This Way

Wednesday, June 14th, 2017

Walks and pathways are a great way to improve the appearance of your landscaping, and unlike planting, it doesn’t need to be done at a particular time of year. Whether you’re hoping to connect outdoor spaces like sidewalks, driveways, patios and pools, or simply want a more harmonious outdoor space, a neatly laid walkway creates both a focal point and better flow in your yard.

If you’re ready to get started on this weekend project, take a look at the video in our Done-in-a-Weekend series. Or, you can keep reading for tips and pointers on making the most of your walkway.

The most cost-effective way to create a walkway is to rely on a combination of gravel and/or mulch. Easy to lay down and without a hefty price tag, the gravel/mulch option allows you to bring your vision to life in a matter of hours.

For a more permanent and stable solution, however, you can turn to pavers. These will require a bigger time investment and will most likely come with higher costs, but you’ll increase your points of access to high-traffic areas without damaging your lawn.

The tools and supplies you’ll need for this project include:

  • Measuring tape
  • Sod cutter
  • Leveling tool
  • Sand, crushed concrete, and/or fine gravel to act as a paver base
  • Paving stones
  • Edging stones

As is always the case before you start any project that requires you to break up the ground, be sure to call 811 for safe digging. You should also walk the path several times after it is completed to ensure there are no trip hazards or loose stones.

Done in a Weekend: Liquid Bliss

Friday, June 9th, 2017

By Doug Scott, Landscape Designer
Redeem Your Ground, Atlanta, GA
Liquid Bliss

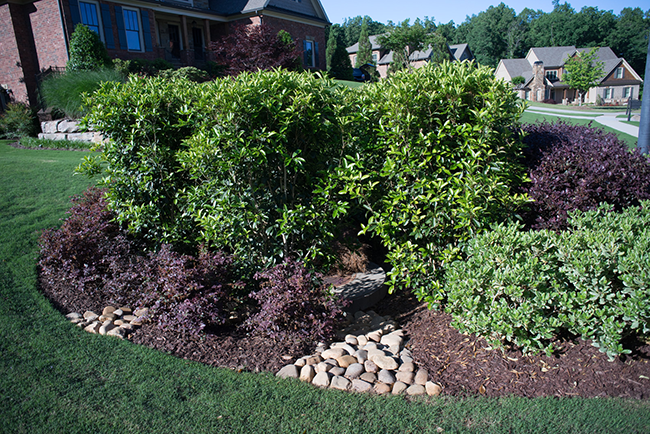
Aside from the serene and restful spaces that running or bubbling water help create, water features add interest and beauty to landscapes not only with their form, but potentially through the unique plants that grow in and around them, and the wildlife that they attract. When used strategically within a landscape design, they can also serve to anchor an inviting gathering space to create a picture-perfect focal point to be seen and enjoyed from both inside or outside your home.

Ultimately, water features help create the perfect spot to start your day off right, or to unwind by at the end of a long day . . . and really, anytime in between. Some might say they provide an element of liquid bliss.

There are a wide variety of water features to choose from that will allow you to achieve your specific goals, so here are a few general types worth considering. Hopefully, these recommendations will help you choose the one that will provide enjoyment for you and your family for years to come.

Fountains

Fountains are perhaps the most common type of water feature that can be added to your landscape. That’s likely due to a number of reasons:

  • They come in a variety of shapes, colors and styles. From classic tiered fountains, colorful urns and funky objects, to extravagant installations or a simple stone with a bubbler atop it, there’s a fountain option that will meet any design aesthetic.
  • There are options that will fit any budget—big or small.
  • There are very large fountains that you could consider (if your budget allows), as well as small options that will work within the smallest of spaces.
  • Compared to the other types of available water features, many fountain options are relatively easy to source from a number of retailers, then install yourself and maintain.
 fountain fountain fountain

For these reasons, most of the water features I’ve installed for clients have been of the fountain variety. They effectively achieve the “bubbling-water sound” objective that most people are looking for, while fitting both their space and budget constraints, as well.

Water Gardens & Fish Ponds

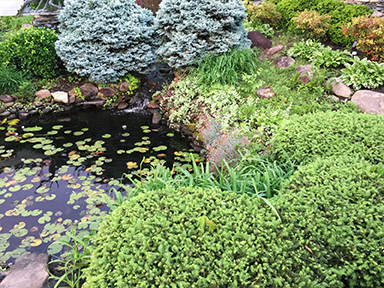
If you’re wanting to bring life to your outdoor spaces in the truest sense, water gardens and fish ponds do just that.

Water gardens are exactly what their name implies: a garden of plants that live in and around water. They provide you with the opportunity to include unique plants in your landscape, bringing with them vibrant colors and interesting structures. Common water garden plants are horsetail, water lettuce, water lilies, blue iris and sweet flag. Note that water gardens are best when incorporated in a more natural, lush setting.

Pond

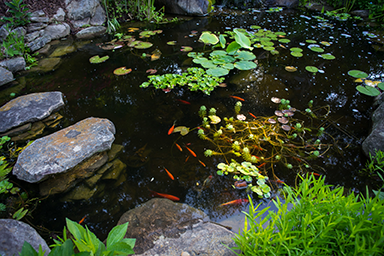
Like water gardens, fish ponds are most often incorporated into more naturalized landscapes. Likewise, the plants used in fish ponds are the same as in water gardens. The added bonus with fish ponds, however, is that you’ll be able to enjoy the fish you’re providing a home for—koi and goldfish being the most common.

Fish

The primary difference between water gardens and fish ponds is that fish ponds must be able to sustain the fish that will reside in them. This not only adds to the cost and complexity of starting a fish pond, but the ongoing maintenance that’s involved, as well. For instance:

  • Fish need oxygen, so you must have a pump that circulates and aerates the water.
  • You must have appropriate types of vegetation, as well. That’s because plants serve three vital functions in your fish pond:
    • They produce oxygen.
    • They provide a great natural source of food.
    • They not only help beautify the space, but also provide cover from predators, as well as shade from the beaming sun. (It’s recommended that about half of the pond have some sort of shade.)

Given that both water gardens and fish ponds can serve as a ready source of water, food and habitat, they provide the added bonus of attracting all sorts of wildlife. But, this can be both a good and bad thing.

Let’s start with the bad. If you’re raising fish, you’ll have to watch out for predators that come from both land and air. Cats, possums, raccoons, foxes and birds (like herons, seagulls, and kingfishers) are known to feast on fish.

Although there’s no fail-safe way to prevent the unthinkable, a three-pronged approach to safeguard against predators is recommended:

  1. Provide your fish cover (somewhere to hide), as mentioned above.
  2. Like in a vegetable garden, place an owl decoy nearby to deter unwanted attacks.
  3. Although not very attractive, you could install a net over your fish pond.

Now, with the bad out of the way, there’s also the good wildlife that’s attracted to a water garden or fish pond. Amphibians like frogs and toads (though, they can pose a problem with fish ponds, so watch for that), birds (the colorful, cute kind, not the predatory kind), and beneficial insects like dragonflies and water spiders are sure to take up residence in this type of water feature.

For obvious reasons, adding a water feature to your yard is a much more involved endeavor than a fountain that you simply pull out of a box and plug in. However, if you’re up for the challenge, the life they will bring to you and your family outside is endless.

Streams & Waterfalls

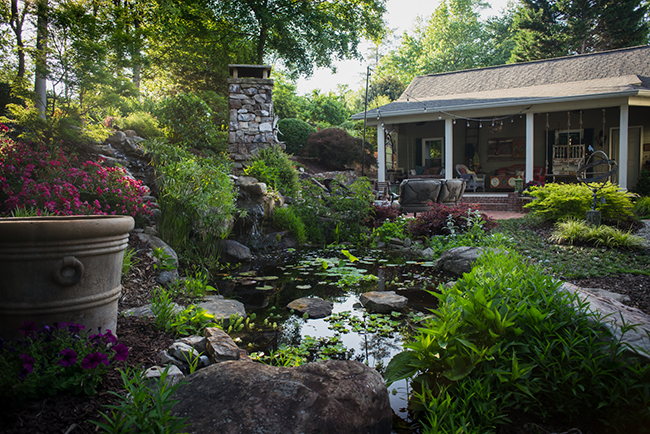
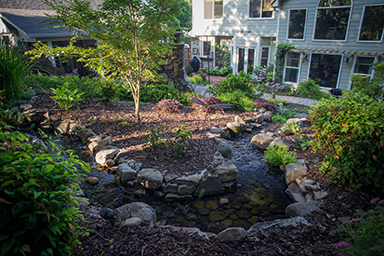
Lastly, streams and waterfalls are another great water feature option to consider if the goal is to add natural beauty and movement to your landscape. Although they can be installed individually, waterfalls and streams are often used together, and can even be incorporated with a water garden or fish pond.

Streams

Like a garden path, streams help create a more natural, meandering setting . This provides you with the opportunity to connect the visual dots from one space to another within your yard, accentuating its curves with boulders or plant material. And, not only do streams bring a beautiful sense of wonder to a space, they can serve the functional purpose of helping you manage drainage, too.

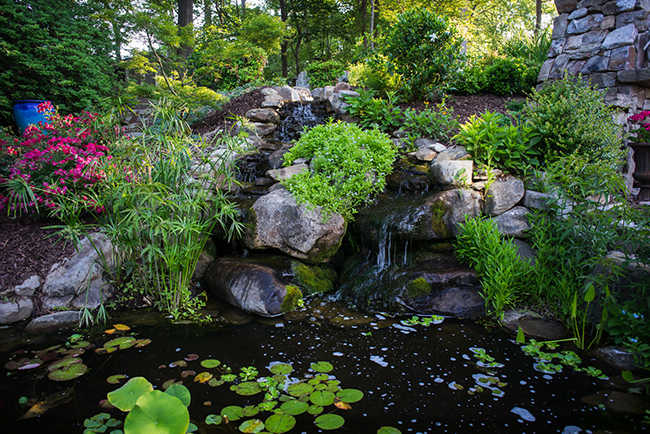
Waterfalls are another great way to add even more sound and drama to your yard. Like streams, they work well when there is a natural grade change, allowing you to take advantage of the drop from one space to another. However, this drop can be created quite effectively with boulders, as well.

Like fountains, waterfalls and streams require a bit of engineering to recirculate and maintain the water appropriately. However, unlike fountains, I’d recommend that you consider hiring a professional for installation, as there are a number of things that could go wrong during the process.

waterfall

Whether you’re looking to add the “oh-so-soothing” sounds that only running water can provide, or simply for a unique way to enhance the natural beauty and interest of your outdoor spaces, a water feature could be the answer. Because, let’s face it—everyone could use a little bit of liquid bliss!

Done in a Weekend: Outdoor Eyesore Makeovers

Friday, June 9th, 2017

By Doug Scott, Landscape Designer
Redeem Your Ground, Atlanta, GA

Like the spaces inside your home, you want your outdoor spaces to not only be attractive, but also reflective of you, and how you want to live outside. Unfortunately, almost every yard comes with views and other eyesores that you’d rather not look at.

But, have no fear. There are ways to address these not-so-attractive yard realities so that you, your friends, and family can fully enjoy your time outside.

Below are the three outdoor eyesores that clients most commonly ask me to address:

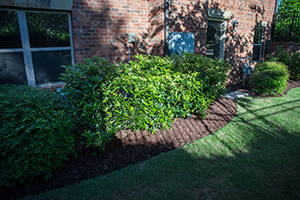
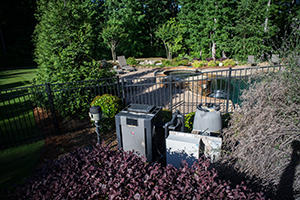
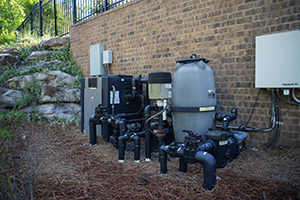
  1. Hiding those utilitarian necessities—like trashcans, HVAC units, utility boxes, water meters and pool pumps.
  2. Blocking the unsightly or unwanted views beyond their yards—like their neighbor’s driveway, garage or backyard.
  3. Bringing back to life those wimpy patches of grass that just won’t seem to grow.

If you’re dealing with any of these eyesores (you’re not alone), read on for practical ways to remedy them.

Utilitarian Necessities

Everybody has them—those unsightly metal boxes attached to our houses or near the street that keep the lights on, our homes at the perfect temperature and communications to the outside world open. Or, a couple of garbage cans conveniently placed just outside our garage. But nobody wants to see them. So, what do you do?

As with most things in your yard, you can approach it in one of two ways (or both): screen them with plant material or something man-made.

Let’s start with plant material. When choosing plant material, you want to make sure to pick the right plant for the right place. And what I mean by that is to choose plants that will thrive in the growing conditions where you’ll be planting them and still fit the space when they mature. In other words, you don’t want to plant something that you’ll have to constantly prune or won’t look healthy over time. Otherwise you’ll just be creating another problem that will have to be dealt with in the future.

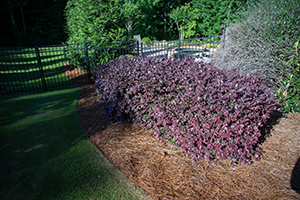
Additionally, because your objective is to hide something, you want to make sure to pick plants that don’t lose their leaves (i.e., evergreen shrubs vs. deciduous perennials). There are a number of varieties of hollies, laurels, and distylium species that will fit the bill. Again, read the labels to make sure they’ll grow to the height you’re looking for and that the growing conditions are right for them to thrive (e.g., sun exposure).

Lastly, if you’re able (and as long as you maintain the necessary access), try to incorporate your plant material with the other planting beds in that space. This will help make things visually flow better, which will keep someone from seeing what you don’t want seen.
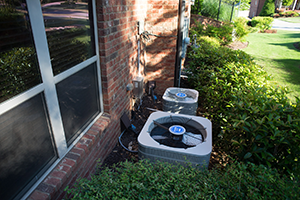
Unsightly AC Unit

Covered Eyesore

Unsightly Pool Pump

Covered Eyesore

[For more planting tips, check out the Layer Up video I did with Exmark in their ‘Done-In-A-Weekend’ video series.]

Next, are man-made solutions. The obvious choice in this situation is to add lattice or fencing in front of these eyesores. If you take this approach, look around to see what else is going on in your yard. For example:

  • If you already have fencing, use the same or complementary material for your screen.
  • If your house has horizontal siding, install horizontal lattice.
  • Stain or paint it a color that already exists on your home or other outdoor structures.

Doing these things will make your attempts to hide something less obvious, allowing it to flow nicely with the rest of your landscape.

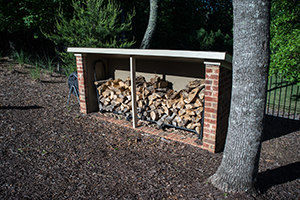
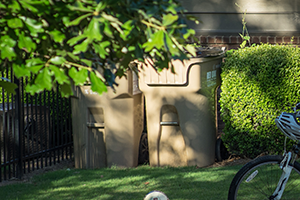
Additionally, you could use an existing man-made structure—like a firewood box or garden bench—to hide your utilitarian necessities.
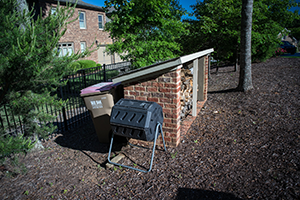
Unsightly Compost Bin

Covered Eyesore

Note: Adding a man-made structure to hide a utility box only works if it is up against, or near, your house. In other words, if you’re hiding utility boxes near the street, then using plant material as a screen is probably your best bet.

Finally, you could utilize both lattice or fencing and plant material. If you don’t have much space to work with, plant a vine to grow on the fence or lattice rather than using evergreen shrubs that will take up a lot of room. Not only will this achieve your primary objective, but it’s a nice way to soften the hard lines of the man-made structure.

While the choice is yours, you’ll have more control by using something man-made, although plant material is often less obvious. Plants also require a bit more maintenance (at least to get established) and can always die, leaving you right back where you started. Regardless, whatever you do, the end result will certainly be more visually appealing than what you’re looking at now!

Unsightly Views

If you live in a neighborhood or more urban area, there’s a good chance that you’re looking right into your neighbor’s backyard or some other not-so-desirable view. But this isn’t just a problem for us urbanites. No matter where you live, there’s often something you want to block, or distract, your view from beyond your property.

And in this situation, blocking and/or distracting the views are the two solutions I’d recommend that you consider. Most of the time when I work with a client, they use the word “block,” but sometimes that isn’t the best option. Keep reading and you’ll see why.

Like I mentioned above when dealing with utilitarian necessities, you have two approaches to block views beyond your property: either with man-made structures or plant material. The obvious man-made solution is putting up a privacy fence.

Unfortunately, there are limits to privacy fence height, and they only block views when you’re near the fence itself. That’s why many people quickly think of a line of 30-foot tall evergreen trees . . . that’ll do the trick! The major downside to this approach is the fact that if trees like these are that tall, they’re also very wide at the base (8- to 15+ feet). This means that you’ll either have less room to enjoy your yard, or you’ll have to cut them down and start all over again once they mature and eat up everything in sight.
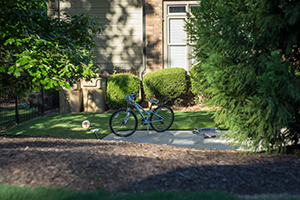
Neighbor’s Trash Cans / Toys

Covered Eyesore

That said, if you do choose to use tall evergreen trees (like cryptomeria, deodar cedar, or several varieties of magnolia), let me suggest that you don’t put 15 of them in a row along your property line. Not only is a 30-foot tall wall of green a bit claustrophobic, it also doesn’t look natural and will only end up drawing attention to something you don’t really want to look at. Instead, look at specific aspects of the views you want to block and place groupings of 3-5 trees in a staggered fashion to strategically fill the most unsightly ‘windows.’

If you don’t have the kind of space required to use these behemoths and you don’t need to go 30-feet high, consider the larger varieties of some of the evergreen shrubs like hollies and laurels, as well as tea olives and certain varieties of ligustrum that I mentioned previously. Your best bet is to seek advice from a local nursery, and be sure and read the labels before digging your first hole.

Another option to consider is using understory trees to distract the views you don’t want to see. When I say understory trees, I’m referring to dogwoods, redbuds, crepe myrtles, serviceberry trees, etc. A lot of times, the reason you’re focusing on what’s beyond your property is because there’s nothing else to see. So give yourself something attractive to look at by using any of these tree options.

I have to mention, though, the downside to using understory trees is that they are deciduous (a fancy word meaning that they lose their leaves), so a good part of the year the only thing distracting your views will be their limb structure. But that may be enough. Your call.

The flip side of the understory tree coin, however, is that their flowers, fruit, changing leaves, and interesting bark and trunk structure will help add seasonal interest to your yard throughout the year, not to mention attract wildlife. And that’s a good thing for everyone!

Wimpy Grass

The other eyesore that almost all of my clients ask me to address is those pesky patches of wimpy grass. I won’t get into the nitty gritty of what fungal issue might be ailing your grass, but often times ‘wimpy grass syndrome,’ as I like to call it, is caused by one of three things:

  1. It’s simply the wrong grass for the growing conditions it’s planted in.
  2. It lays within a high-traffic area.
  3. And related to #2, the strip of grass is too narrow.

So, before you pull your hair out or work yourself to death trying to keep your wimpy grass alive, it may simply be that it’s not the right grass for the sun exposure where it’s growing. So if your grass needs 6-8 hours of sun but only gets 2, it won’t thrive there. It’s also possible that your sun exposure isn’t the same throughout your entire yard, so you’ll have to make a call on where you want most of your lawn and then grow something else in those other areas.

[Note: Some grasses that do best in the sun are Zoysia, Bermuda, Centipede and St. Augustine. Shade- tolerant grasses include tall fescue, as well as certain varieties of Zoysia and St. Augustine.]

Secondly, if you’re trying to grow grass where there is a lot of traffic, you may be fighting a losing battle. Turf grasses like Zoysia and Bermuda will take more traffic than fescue. But even then, you may need to raise the white flag if you’ve aerated when you should and exhausted all other maintenance options.

Similarly, even if your wimpy grass patch doesn’t get a lot of traffic, a narrow strip of grass may still be petering out. That’s likely because it’s so narrow you can only mow it in one direction. And eventually, over time, your grass will give up, as it just can’t hold up under those harsh conditions.

So, what do you do if you have wimpy grass? Most of your options are actually quite simple:

  • If it’s not the right grass, plant the right grass.
  • For high-traffic areas where you have a turf grass (e.g., Zoysia or Bermuda), if it makes sense, consider cutting in stepping stones through the area to essentially tell those walking through the space where to walk and where not to walk. Unfortunately, bunchgrass like fescue wouldn’t thrive in this type of situation.
  • Let Mother Nature tell you where to grow grass and expand your planting beds so that the perimeter of your lawn lines only extend to where the grass will thrive. Then simply fill in the beds with plant material.
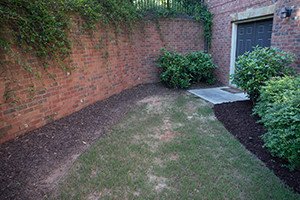
Wimpy Grass

Covered Eyesore

If none of these more obvious options work for you, you could plant a grass substitute, like dwarf Mondo. While it will give you the look of grass (though it’s not, so you won’t likely want to play football on it) it will take a good bit of time to fill in.

Whichever route you choose, I’m confident that one of the options above will help put your days of wimpy grass behind you.
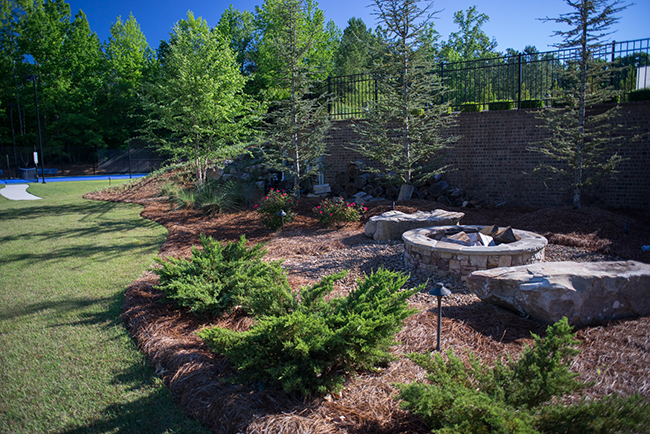
Although these outdoor eyesores may be the bane of your existence today, with the right approach you can get them behind you and out of sight sooner than you think. Just make a decision and move in that direction. Hopefully these eyesore makeover tips I’ve provided will help you get on to the business of enjoying your time outside at home!

Done in a Weekend: So Mulch to Consider

Tuesday, June 6th, 2017

You might not think the type of mulch you use to surround your plants and flowers will make a big difference (except in terms of aesthetics), but this is one area where you want to spend a little time making the right choice. If you’re looking for another Done-in-a-Weekend project, this is a great one.

In addition to providing an attractive touch to your home’s landscaping, mulch provides weed control and helps maintain soil moisture. Depending on which type of mulch you choose, your garden could require regular weeding and watering, or you could be able to let your flowers take care of themselves for a while.

The number one piece of advice to take away in this video is that you should always match your mulch to the plants you have growing in the area. This may mean that you will need to vary your mulch by plantings—and that’s okay. In fact, the different mulch types and textures could provide a beautiful finish to your landscape.

The main types of mulch include:

  • Pine Needles/Pine Straw – This inexpensive mulch (grass clippings are another choice) is easy to get your hands on and maintain.
  • Hardwood Mulch – More attractive than pine straw, without a lot of upkeep.
  • Dyed-Wood Mulch – The different color choices can provide color contrast with lawn and flowers, but some of the dyed options can contain additives. Always look for raw vs. recycled brands.
  • Pine Nuggets – These vary in size from mini to jumbo, so you can decide which option looks best for your yard.
  • Stone – This high-impact look requires the most upkeep and causes warmer soil conditions, but offers one of the most elegant finishes.

No matter which mulch you choose, remember that it does need to be refreshed from time to time.