Archive for the ‘Backyard’ Category

Is Lawn Aeration Really Necessary?

Thursday, August 6th, 2020
lawn aeration with an Exmark stand-on aerator

If you’re new to lawncare, you might be wondering, is lawn aeration really necessary? We find that when people ask “is it necessary” about lawn maintenance tasks, they’re really wondering if the benefit will be worth the time and effort it involves. The answer is, of course, it depends upon your lawn.

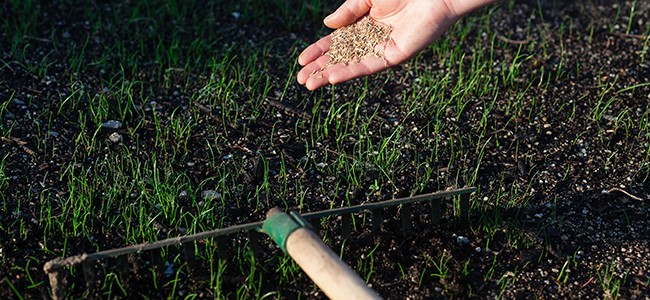
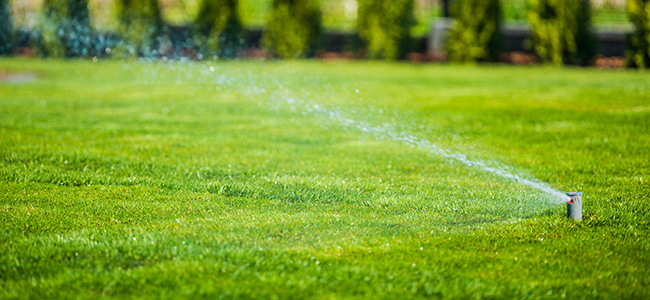
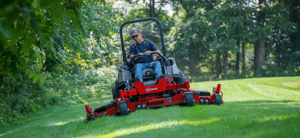
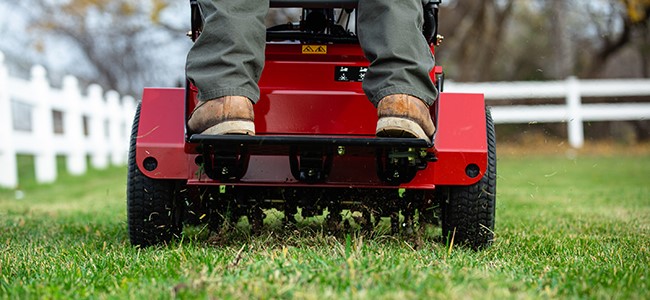
The goal of aeration is to improve oxygen, nutrient and water uptake by your lawn’s roots. Whether you rent a core aerator or use one of many kinds of tine aerators, all those holes will improve the air flow, lawn drainage and allow more nutrients to reach the roots. So even if your lawn is in good shape, it will be beneficial to aerate in the spring or fall. If you aerate and then fertilize, it will make fertilizing more effective.

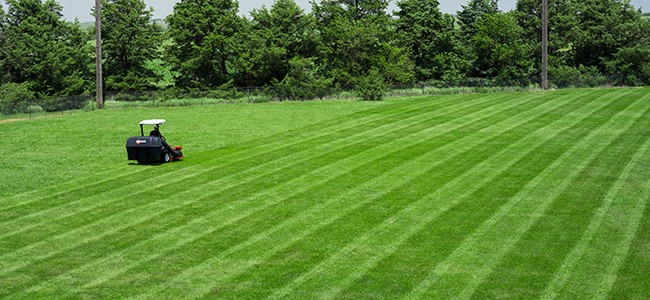
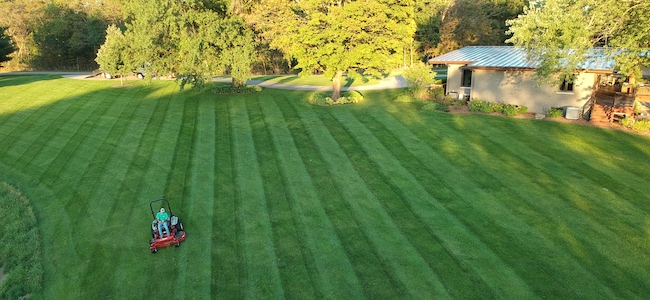
Lawn aeration is really necessary when nutrients and oxygen can’t get to the roots. Soil compaction can prevent air flow and proper drainage. Compaction can be due to heavy foot traffic, or to machine traffic, such as mowers or construction equipment. Soil composition is also a factor; if you live in an area with heavy or high clay content soil, your lawn will compact more easily than light or sandy soil.

Sure signs of compaction are that it’s hard to dig, slow drainage, even after light rain, in low areas, and high run off. Stunted plant growth, shallow tree roots, and bare areas can also signal compaction. Lawn aeration can help your soil recover from foot or machine traffic. For heavy or clay soils, you may also want to work organic material into the ground to help change soil composition.

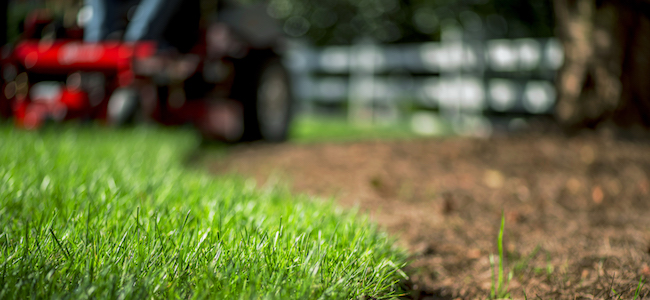
Aerating can also be beneficial if you have a deep thatch layer. Thatch is organic material, like grass clippings and leaf mulch, that sits on top of the soil. A small layer of thatch is beneficial, but more than half an inch will prevent air and nutrients from reaching the roots. If your grass feels springy or spongy underfoot, your lawn probably has too thick a thatch layer. Aeration will speed up decomposition of thatch by increasing bioactivity. If you’re aerating due to thatch, you should use an aerator that pulls plugs of at least 1” of soil.

Lawn Striping: How to Mow Stripes and Patterns

Thursday, July 23rd, 2020
An Exmark mower striping a lawn

Nothing makes a lawn look better than crisp lines. Whether it’s a simple stripe or a complex pattern, lawn striping makes a lawn look like a professional mowed it. If you’re struggling to get the look on your lawn, here’s how to mow stripes or patterns in your lawn.

What Causes Lawn Stripes?

Lawn stripes are nothing but reflected light. What happens is when you make a pass with your mower, the grass is bent. When you make a pass in the opposite direction, the grass bends away in a different direction than the first pass. The grass bent towards you appears dark, while the grass bent away from you appears lighter.

Do You Need a Striping Kit or a Fancy Mower?

While a striping kit will push the grass over further, you don’t need one. And any mower, even a 21” residential walk-behind, can be used for striping, although zero turn and riding mowers will make complicated patterns, like diamonds, easier. Mowing slightly higher makes stripes more pronounced, as the grass will bend further. Shorter blades will bend less, so if you want to make the most of your stripes, set your mower about half an inch higher than usual.

Another thing that will make your stripes stand out is a healthy and full lawn. Taking the time for spring lawn maintenance will pay off later in the summer, when your lawn is lush and green, with beautiful stripes.

How to Mow Stripes in Your Lawn

Decide which directions you want your stripes to run. Stripes that are perpendicular to the street will be more noticeable than ones that are horizontal. Start on an edge of the lawn and mow a straight line; to keep your pass straight, look about ten feet in front of the mower, not at the ground right in front of you. At the end of your row, be sure to lift the mower deck as you turn. Mow in a straight line next to the first stripe.

How to Mow Checkerboards

To mow a checkerboard, start with your basic stripes. Then mow the lawn at a 90% angle to your stripes. Finally, mow a strip around the edges of the lawn.

Other Mowing Patterns

For those that want to give their lawns the look of a ball field, there is the diamond pattern, which involves mowing one pass on a diagonal, then two passes in the other direction. Then mow in the same one-pass, two-pass pattern on a diagonal at 90 degrees to the first set of diagonals. For circles, start at the center of your lawn and mow in one direction. Lift the deck and mow a second circle in the opposite direction. Keep repeating until your entire lawn is mowed.

Want to see a pro mowing stripes? Check out this video of Brian Latimer lawn striping.

How to Top Dress and Reseed Your Lawn

Wednesday, July 15th, 2020
hand reseeding a lawn after top dressing

Any lawn, no matter how well cared for, can develop low spots, uneven patches and bare spots. Whether they’re caused by erosion or the ground settling around pipes or other installations, they can typically be resolved by top-dressing. Top dressing is also a good time to add organic matter to your soil. Here’s how to top-dress and reseed your lawn.

You can buy a high quality top-dressing mixture at your garden center, or make your own. To create your own, use a mixture of loam or topsoil, compost or peat, and sand. The proportions of these will vary depending on your lawn; for sandy soil, use more topsoil and compost, and for clay soils, increase the sand and compost to improve the soil composition.

If you’re top-dressing the entire lawn rather than a few problem areas, it’s a good idea to aerate beforehand. This will help the organic matter work its way into the soil, reduce compaction, and provide channels for air and water to reach the roots.

To apply the top-dressing, work in a few square feet at a time. Make a small mound of top-dressing on the lawn (2-4 shovels full) and spread it across the grass. The back of a garden rake is a good choice. Cover low spots and work it into the aeration holes. Ideally, you want a layer between half an inch and an inch over the grass. Work it until the grass begins to peek though the soil and the layer is even. Then flip your rake over and use the tines, raking until the top dressing settles on the soil.

For low spots that will require more than two inches of top dressing, remove the existing sod. Simply covering the existing grass can lead to underground decay, which can damage new grass and cause the ground to settle again. The sod can be replaced once you’ve filled the low spot. In extreme cases, you may need a multi-year plan, top dressing a couple of inches a year to gradually build the spot up to the level of the lawn.

Once the entire lawn is top-dressed and even, give it a gentle watering and check your low spots for settling. Smooth away bumps, and fill in any divots. If you dug sod out of low spots, replace it. (Learn how to choose the right sod for your lawn.)

The existing grass can grow through up to an inch of top-dressing, but if you had thin grass or bare spots, now is the time to reseed. The organic matter in the top-dressing will provide nutrients to the seedlings as they sprout and fill in.

Top dressing and reseeding is most effective in early spring, when cooler air temperatures and warmer soil temperatures will promote growth. Early fall is also a good time; you just need to allow enough time for new growth and to be able to mow three or four times before dormancy sets in.

For more lawncare tips, check out Exmark’s Backyard Life.

Landscaping Tips to Reduce Fire Risk

Thursday, June 25th, 2020
Homes with hardscaping around them can reduce fire risk

While we often think of wildfires as being a western problem, the threat from wildfires has increased in almost all areas of the U.S. California and the Pacific Northwest get much of the attention, however, wildfires burned hundreds of thousands of acres in the southeast, mid-Atlantic, New England, the Midwest, the Great Plains, and the Rocky Mountain states in 2019.  For people living in rural settings, small towns or the farthest reaches of suburbia, wildfires are a real risk. Here are some landscaping tips to help reduce fire risk.

First, trees and shrubs close to the house provide the greatest risk to your home. They can catch fire and  easily spread to the walls and roof. Strong winds can also blow sparks onto your roof from tree limbs that are ten to fifteen feet away. Aim for a 30-foot safety zone around your house and any other buildings.  Relocate or eliminate existing trees that are less than thirty feet from your house.  Keep shrubs small, well pruned, and away from buildings. Prune tree limbs that come within fifteen feet of your roof or walls.

When possible, avoid highly flammable plants, including most pines, evergreens, junipers and fir trees. Two notable exceptions are Ponderosa pines and Western larches as they have thick bark and high water content in their needles. Additionally, deciduous shrubs are more fire-resistant than conifers. Consult with a garden center about good choices for your area. Choose low growing rather than vertical bushes, and prune back any dead branches.

A good rule of thumb is that plants with strongly scented oils are likely to be highly flammable. An exception is lavender, provided it is kept well-watered. Drought-tolerant plants are another good choice, as they will be less likely to turn dry and brown. The more green and lush your annuals and perennials are, the more fire-resistant they will be.

When designing planting beds, keep them five feet from the house. Create gravel or rock borders between the house and planting beds, and keep them clear of dead vegetation. Ground cover vines, like ivy and vinca, are good choices for creating visual interest and differentiating between lawn and beds, but be sure that they don’t start growing up walls or other structures.

Rather than tall ornamental grasses, which dry and can be fuel for a wildfire, consider planting sedges. They grow in short, tidy clumps, rather than spreading like grasses do, and they can be evergreen.  Succulents, like sedum, hens and chickens, and yuccas, are also good choices, as they store water and will be less likely to dry out.

Bark mulch can be a fire hazard if it dries out, so consider choosing gravel or rock instead. If you do opt for bark mulch or wood chips, be sure to water frequently enough to keep it damp. Rock gardens with a variety of succulents and perennials are a good choice when landscaping to reduce fire risk.

When designing outdoor living spaces, avoid wooden decks, especially if they’re built adjacent to the house. Choose brick or paver patios instead, with low (2-3 foot) walls that can act as a fire break. And rather than using stepping stones to connect areas, create gravel or paver pathways. If wide enough, they can help stop fires from spreading to your house.

With thought and care, you can design a beautiful landscape that helps reduce fire risk. But the most important step will be to maintain it. Keep grass mowed, debris cleared away, and trees and shrubs pruned.

Lawn Care: How Much and How Often Should You Water Your Lawn?

Wednesday, June 17th, 2020
Watering the lawn

Now that the temperatures have soared and the sun is blazing, you may be wondering how much and how often to water your lawn. Watering the grass may appear simple, but your lawn’s water requirements change with the season. It’s important to find the balance between under-watering and over-watering to ensure your grass is obtaining all its necessary nutrients.

When considering what the right amount of water is, you need to take into consideration both regional and seasonal issues that can impact your growing. Water needs will vary depending on the type of grass in your lawn and the current weather patterns.   

COOL-SEASON GRASSES

Cool-season grasses, like Kentucky bluegrass, fescues and perennial ryegrass, grow across much of the Midwest and northern US. They can survive both freezing winters and hot summers. The ideal growing periods for cool-season grasses are the spring and fall.

Spring

Heavy seasonal rainfall will keep soil moist, and grass will flourish as it emerges from dormancy.

You should only need to water if temperatures are above average, or there is below average rainfall.

Summer

Cool-season grasses need a recommended 1 inch of water per week to flourish and be healthy. If there is a constant rise or fall in temperature, then you may need to adjust this number accordingly. A best practice is to water once in the morning and once before sunset to ensure a full release of nutrients

Fall

Begin to cut down your watering by about 50%, but still focus on maintaining healthy levels of moisture. Grass will begin to turn brown as it goes dormant.

WARM-SEASON GRASSES

Warm-season grasses like Bermuda, St Augustine and zoysia, cover most of the Southern United States. They survive best in hot tropical regions that have elevated temperatures and high levels of moisture. These grasses grow best during warm summer months.

Spring

Warm-season grasses will begin their growing periods during mid to late February. Grass needs a recommended 1 to 1.25 inches of moisture per week (includes physical watering and rainfall). Start watering early to ensure full growth.

Summer

Pay attention to local conditions to maintain safe water levels. Unless there’s lower than average rainfall, warm-season grasses will flourish on their own.  Aerate your lawn if you’re not seeing desired growth.

Fall

Rainfall will increase, and temperatures will begin to fall so your lawn shouldn’t need much watering. Grass should not be getting more than 1 inch of water per week. Be sure to rake leaves to ensure grass is still getting sunlight.

If you’re in a drought-prone area, local restrictions may make it hard to get your lawn adequate water. Consider creating a drought-tolerant lawn that will stand up to your conditions better than a traditional lawn.

Not every lawn will follow the same watering and maintenance pattern, so it’s best to tailor a schedule that works for you. A local lawns specialist can help develop and maintain a watering schedule that works for your lawn, location and conditions.

Tips for Getting a Professional Looking Lawn

Wednesday, April 29th, 2020
Stripes help make a lawn look professional

Wondering how to get a professional looking lawn this year? We have six professional lawn tips to make your lawn the envy of the neighborhood.

Keep Blades Sharp: It doesn’t matter how powerful and technologically advanced your mower is if the blades are dull. Dull mower blades tear grass and result in an uneven, ragged edge, rather than a clean cut. Hundreds of thousands of grass blades with ragged edges will result in a ragged and uneven lawn. Mower blades should be sharpened every 20 to 25 hours, so for most homeowners, that’s once or twice a year. Pro tip: Make sharpening blades part of your spring mower maintenance.

Wondering how to get a professional looking lawn this year? We have six tips to make your lawn the envy of the neighborhood.

Mow Often, Cut Less: Trimming less from the grass but mowing more often will mean that your lawn doesn’t get long and look overgrown. And nothing looks less like a professionally mown lawn than one that’s overgrown and weedy. Additionally, even sharp blades can tear long grass, especially if you didn’t adjust the mower height correctly. Never mow more than one-third of the grass blade at a time.

Don’t Get in a Rut: Over time, using the same starting points and path to mow your lawn will create wear patterns. This can create ruts and uneven spots that cause scalping. Make a practice of mowing rows one week, and diagonals the next.

Show Your Stripes: Nothing makes a lawn stand out quite like stripes or patterns, and pros are masters at this. Adding a striping kit—a roller that pushes the grass down after it’s cut—will make your stripes stand out and accentuate patterns.

Edge After You Mow: Edging really adds that professional finish. The pros typically use a string trimmer with the guard removed to edge along fences, sidewalks and garden beds, and that sharp line is the difference between mowing your lawn and manicuring it. Whether you use a trimmer, a power edger or the old-fashioned step edger, taking the time to edge will help your lawn stand out.

Spot Treat Weeds: Spot treat weeds early to prevent them from spreading. Ideally, you want to spray weeds like dandelions and clover before they flower and go to seed.

Following these six professional lawn tips will go a long way to keeping your lawn Instagram-worthy all summer long. Of course, a professional grade mower will also help. Whether you need a 21” self-propelling mower or 60” residential zero-turn mower, Exmark mowers offer durability, comfort, and legendary quality of cut. Find your local Exmark dealer.

Rethink Your Landscaping to Make Mowing Easier

Tuesday, February 25th, 2020

Before lawn care season begins for most of the United States is a good time to rethink your landscaping to make mowing easier. Especially if you had trouble mowing around plantings, or worse, mowed over low-growing plants because you couldn’t see them.

Think back on your mowing over the last year and identify any persistent problems. Were there areas where you couldn’t get your mower between two trees, and were forced to trim that spot by hand? Does your lawn have awkward low spots that were hard to mow? Did odd angles make certain spots difficult to move in and out of? If you answered yes to any of these questions, use these design tips to create a more ‘mower friendly’ yard.

Use borders to separate plantings and lawns. Choose landscape stone, pavers, edging, or wood depending on your style. Whatever you choose, a clear border will help you avoid mowing plants. They will also provide a clear transition between lawn and garden areas and give plantings more visual impact.

Center your lawn. If you keep plantings and shrubs on the perimeter of your lawn, you will eliminate obstacles to mowing. Keep edges straight for a more formal look, but use gentle curves for more casual landscaping. Straight lines and gentle curves will make your mowing easier; avoid creating tight angles.

Plant in groups. If you currently have several disconnected small beds or small shrubs, consider connecting them in a larger, mulched grouping. You’ll have fewer things to mow around, and your plantings will have more visual impact.

Use vertical space, as well as horizontal. Create raised planting areas or plant taller shrubs or ornamental trees. These will be easier to see and avoid while mowing while adding an additional element to your lawn.

Dig stepping stones in. Ideally, stepping stones or paver paths should be flush with the ground so you can mow over them without hitting the blades. If you have stepping stones that sit on top of your lawn, add digging them into the lawn to your early spring to-do lists.

Use planters and pots if you have a deck or patio. Choosing large containers rather than planting in the ground will let you skip having to mow around plants entirely. Container gardening has some definite benefits, too. For one, you can rearrange plant layout simply by moving the pots. letting you change how your yard looks. And in colder climates, pots let you grow more tropical plants, like citrus, fig and even banana trees, and move them indoors to overwinter.

If you have an uneven lawn with holes or low spots, plan now to fill them in. You could also consider smoothing out steep grades that make mowing difficult.

If you’d like fewer hassles when mowing, re-evaluating your landscaping is a good first step to make mowing easier. Minor adjustments to create beds, add borders, and even out tight angles can pay off with easier access for your mower, less hand trimming, and a yard with more curb appeal.

Tips to Keep Your Lawn Looking Great: Install Anti-Scalp Rollers and Lawn Striping Kits

Thursday, August 1st, 2019
Examrk Zero-Turn mower keep your lawn looking great with features like anti-scalp rollers and lawn striping kits

Two relatively simple upgrades to your lawn mower can elevate your lawn. Anti-scalp rollers and lawn striping bars are easy to install, relatively inexpensive, and help keep your lawn looking professionally cut, without the cost of hiring a lawn service.

Avoid Lawn Scalping with Anti-Scalp Roller Kits

One of the quickest ways to kill a lawn is to cut the grass too close to the base. Longer grass is healthier for several reasons, including the additional shade provided by the long blades of grass, the ability to hold moisture for longer, and the ability to photosynthesize more energy. Knowing how to strike the perfect balance between grass length for health (where longer is better) and grass length for aesthetics (where a nice, clean cut is ideal) is a key element in good lawn care.

While the most common cause of lawn scalping is setting the mower blades at the lowest height, accidental scalping can happen. This is usually due to an uneven or bumpy lawn, especially ones with lots of low areas. As the mower is no longer level, you can slice the grass too close to the base.

If you’ve just upgraded to a wider mower, it can come as a surprise that a yard is uneven. With a small walk behind, those tiny dips and divots often go unnoticed. When you’re making wide passes with a heavy piece of machinery, every bit of uneven ground becomes a potential scalp zone. A wrong turn could have you running the deck into the dirt and cutting away a much bigger chunk of grass than you intended.

The best way to keep your deck from digging into the dirt or bottoming out is to install anti-scalp rollers onto your mower. These easy-to-attach rollers protect the trim side of your deck so that it remains level and flat over the toughest terrain. Many of our mowers have an anti-scalping roller option making it less likely to scalp the lawn.

It is important to keep these anti-scalp rollers in good condition and repair, as the roller pins can come loose, and the wheels can wear down with excessive use. If you routinely work on uneven ground, you should include roller maintenance into your regular mower upkeep schedule.

Lawn Striping Kits

If you want the crisp stripes of a ball field and you aren’t currently achieving them, installing a striping bar will give you the defined stripes you want. Stripes occur because of the way light is reflected off of blades of grass after the mower has passed over it. A pass in one direction pushes the grass blades to the right; as you come back the other direction, the mower pushes them the left. A striping bar will push the grass down further, accentuating your stripes.

With the right mower, Exmark upgrades, and vigilance, you can get the professional results you want, no matter what the terrain. Find a local dealer to get the Exmark mower that’s right for your lawn.

What to Do with Lawn Clippings: Should You Bag or Mulch?

Wednesday, July 17th, 2019
An Exmark mower micro mulching lawn clippings

What to do with all those lawn clippings? The average square foot of grass has an estimated 3,000 individual blades, meaning even a small lawn will generate millions of clippings each time it’s mowed. You have three options: Cut and bag, cut and rake, or cut and mulch.

Mulching is the easiest choice. You cut the lawn and leave the clippings where they lie. This is often the best choice for your lawn, too, as the clippings help add nutrients and moisture back to the ground. The drawback is that many people find the clippings unsightly.  If you’re one of these people, a micro mulching mower (or a mulching kit to add to your existing mower) may be the answer. With micro mulching, clippings are cut into fine particles that are less visible, and they break down more quickly than larger clippings.

Using a bagger to collect your clippings will give you an ultra-tidy lawn, but doesn’t return valuable nutrients to your lawn. If you would like the benefits of mulching and an immaculately groomed look, the Exmark Navigator might be the right mower for you. Its patented fill reduction system lets you choose how much of your clippings to bag and how much to mulch. With options for bagging all, a third, or none of your clippings, it’s a great choice for landscape pros who service customers with different preferences. And, during heavy growth periods or when grass is very wet, bagging only some clippings can be a good option.

If you bag your clippings, you’ll want to look for a bagger that comes on and off easily. Exmark walk-behind Commercial 21 and Commercial 30 mowers have bag designs that eliminate the need for levers and doors. A top-fill feature lets you check how much room you have during operation. And you’ll want it to be easy to empty, especially if you’re emptying it into lawn bags.

For larger zero-turn mowers, Exmark UltraVac Collection systems have large-capacity hoppers and are designed with larger diameter tubes to avoid clogging. Some UltraVac models include a quick dump release lever, while others can easily switch between bagging and discharging.

If you do bag your clippings, you can take advantage of the nutrients by composting them.  The composted clippings can be added to flower beds, vegetable gardens and around trees.  Just be sure to turn clippings periodically to promote decomposition and oxygen flow.

No matter what your preference for clippings, Exmark mowers will make it easier to handle them. Find an Exmark dealer near you to see the full range of mowers and accessories.

What Size Mower is Right for Your Lawn?

Thursday, February 21st, 2019
an exmark mower cutting a lawn

Many homeowners want to mow their own lawn, but they would like to spend less time mowing. If you fall into this category, you may be considering just buying a larger mower and being done with it. But mowing efficiently is about more than just speed and deck size. Here are some things to consider as you think about upgrading your mower.

How Much Mower Does Your Lawn Need?

Your lawn size and terrain, not the amount of time you want to spend mowing, should dictate your mower size. A good starting point for a medium-sized yard – an acre to an acre and a half — is a 42” mower. With a larger mower, you’ll spend a lot of time maneuvering into position and around tight corners. For homeowners with one and a half to three acres to mow, a mower with a cutting deck between 42” to 48” is a good size.  Over three acres, you’ll want something larger.

Before buying a 72” mower for lawns greater than three acres, consider your terrain. Wide mowers perform best on flat, open ground. If your yard resembles a football field, a wide mower deck may be your best bet. However, if you have three acres of hills, dotted with trees and plantings, a wide mower may not be the right choice. Mowers that are too wide can scalp areas on uneven ground. A mower that’s too big will make mowing around obstacles, trees and shrubs more difficult.

If you have a large, hilly lawn, a mower with a smaller deck and a bigger engine may be the best option. You’ll be able to mow faster, without sacrificing precision or maneuverability.

What About Less than an Acre?

If you have between a quarter of an acre and a full acre, and are wanting a riding mower, you’ll want a deck under 40”, like a Quest zero-turn mower with a 36” deck. If your home is on an average U.S. lot (.35 acres) and you feel it’s too small for a riding mower, but a standard push mower isn’t working for you, consider a 30” self-propelled mower. It will cover a third more lawn on every pass, with less effort on your part.

Is My Yard Large Enough for a Wide-Area Mower?

For most homeowners, no. Wide-area mowers are designed for commercial use, especially for mowing parks, cemeteries, recreation fields and other wide, flat properties. If you run a residential lawn mowing service, you’ll need to calculate whether you have enough large properties among your mowing customers to make the expense a good investment.  Getting the right size mower is critical, whether you choose a 42” zero-turn or a 30” self-propelled walk-behind. For help determining which size mower is right for your residential or commercial needs, your local Exmark dealer can help you figure out the best mower type, deck width and engine size.