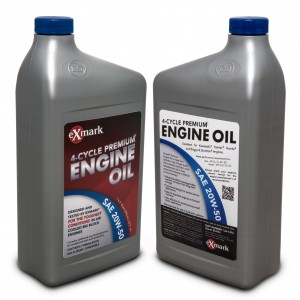
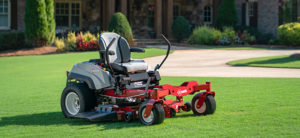
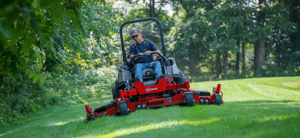
Kent’s Lawn Service Owner, Kent Harlan, talks through safe operation of the Exmark Spreader-Sprayer, as well as routine maintenance he recommends for the machine.
View additional Spreader Sprayer videos on the Exmark YouTube channel, or learn more about the Exmark Spreader Sprayer at Exmark.com.
Posts Tagged ‘maintenance’
Exmark Spreader Sprayer: Safe Operation and Routine Maintenance
Sunday, December 6th, 2015Why Exmark Original Parts Make a Difference
Thursday, April 30th, 2015Whether you mow your lawn once a week or you own a multi-location landscaping company, when it comes to replace parts on your Exmark equipment, only Original Exmark parts will do. If you want to get the most out of your machine, original parts make all the difference in the world.
Tried and Tested
You can learn a lot by testing data in a lab or research center. That said, the bottom line is how a product or part performs in the real world, so we test Original Exmark parts as our customers would, which means getting our hands dirty. When part breaks or wears out, we take it back, learn what caused the problem, and find a solution through engineering and testing. We also know our customers are by far our greatest asset when it comes to improving our products, so we make it a priority to listen to, and proactively solicit customer feedback. We use your feedback along with our own data and testing to create parts that meet our stringent standards for performance and durability.
Variety and Availability
Do you need a 36″ Blade Drive for your Viking? Or, how about a throttle cable for your Commercial 21 X-Series mower? Are you looking for a new tire for your Navigator? If you need a part for your Exmark machine, we have exactly what you need, and it’s engineered precisely for your machine. We understand how important it is to provide you with quality parts in a timely manner. When you order original Exmark products from your local Exmark dealer, you won’t be disappointed.
Consistency Is Crucial
Consistency is crucial in everything you do. At Exmark, we understand that consistency between our parts and accessories can mean the difference between a job well done and a lost client. Our rigorous testing procedures and your ongoing feedback help us deliver the highest quality parts and accessories available.
What makes our parts better than the rest?
- We field test every part and accessory for hundreds of hours before certifying it meets our standards.
- We use the latest engineering and manufacturing technologies to ensure every product is optimized for the job it is built to perform.
- We use customer feedback to ensure Original Exmark parts and accessories meet the stringent standards of our users.
Ordering Made Easy
The last thing you want to do is spend hours online or in your owner’s manual trying to figure out what broke or how to fix it. We make it easy to find exactly what you need. If you need a part for any of our products, we provide an easy reference guide to help you pick exactly the right part for your Exmark machine.
Keep Your Mower Running
All of the best parts in the world can’t keep your Exmark equipment running properly if it isn’t well maintained. Each one of our products has a specific maintenance schedule that must be followed to preserve its performance and durability. By following the maintenance guidelines, your Exmark equipment will give you years of reliable service.
Make the Most of Your Mowing
If you want to get the most out of your Exmark equipment, proper maintenance is a must. And when something does wear out, replacing it with Original Exmark parts will help extend the life of your machine and save you money for years to come.
The Importance of Keeping Mower Blades Sharp
Thursday, March 26th, 2015At Exmark, we understand the importance of making sure your lawnmower is in tip-top shape in preparation for the upcoming landscaping season. One of the top maintenance items for any rotary mower is to ensure blades are properly sharpened, balanced and in good working order.
Why Sharp Blades Matter
When you are shaving your face in preparation for the day, think about the difference between the times you use a brand-new razor blade and the times you are trying to get one last shave out of an old blade. When using an old blade, your skin is more prone to cuts, infection, and irritation. When using a brand-new blade, you get a nice, clean shave.
The same thing happens with your grass. If the blades are dull or nicked, the lawn will get cut in a ragged way, causing it to suffer damage and become more susceptible to pests and other diseases. But if the blades are nice and sharp, the grass will get a clean cut, with greatly reduced damage or stress.
Blade Inspection
At the beginning of the landscaping season (and after roughly 8-10 hours of service) do a thorough inspection of your mower’s blades. Signs of a dull blade include bends, nicks, and/or dents. You’ll want to ensure the blades are properly sharpened and balanced. In addition to the physical inspection of the blades, do a quick inspection of the lawn before you begin your landscaping — clear away any rocks, sticks, or other debris in the immediate area. As you mow, keep an eye out for these blade-nicking items.
Properly Sharpening Your Blades
Keep in mind these few basic tips for sharpening your blade:
- Wear protective gear, such as safety glasses
- Disconnect the spark plugs
- Remove the blade (instructions are found in your owner’s manual)
- Use a metal file or sharpening stone
- If using a file, run it in the direction of the blade’s angle — never file back and forth
- Work in one direction only; blades usually have an angle of 45 degrees
- Consult your owner?s manual for procedures specific to your mower
Depending on usage, replace your lawn mower’s blade(s) every 1-3 years. Always use OEM blades designed for your specific mower. Universal blades may save you a couple dollars, but can cause potential safety issues from improper mounting and/or the type of metal used to construct the blade.
Properly Balancing Your Blades
Having properly balanced blades is every bit as important as blade sharpness. An unbalanced blade causes stress on the engine and cutting deck due to vibration.
After you sharpen the blade, test its balance with a blade-balancing tool. If you don’t have access to this specialized tool, you can hammer a nail partway into a wall in your garage and hang the blade from it (using the center hole). If the blade hangs horizontally, it is in balance. If one side drops, remove excess material from the side it leans to, using a file or sharpening stone.
Professional Sharpening
If you follow these recommendations and have the proper tools and safety gear on-hand, sharpening your blades is a relatively easy task. However, if you don’t have the proper gear, or don’t feel comfortable doing this type of maintenance yourself, your local Exmark dealer can quickly sharpen and balance blades for you.
Bottom line: using sharp blades will help you have a perfectly mowed lawn, every time.
Resources:
How Do You Know When It’s Time to Tune Your Lawn Mower?
Wednesday, March 18th, 2015Believe it or not, this Friday is the first day of spring. Along with the blossoming trees and pretty flowers comes the growing grass. If you own a landscaping or lawn care company, your busy season is fast approaching. One of the most important things you can do to prepare for a successful season of cutting grass is to service your mowers.
Here’s a quick list of ways to know when it’s time to tune your mower:
Service Tip 1: A New Season
Before every new mowing season, you should take your mower in for a tune-up. This doesn’t just apply to lawn-care companies. Whether you mow hundreds of acres a day or do your own yard once a week, every mower needs a tune-up before a new season of mowing. Lawn mowers are the workhorses of any landscaping company and need to be in perfect condition if you want to stay profitable. Using old, worn-out, faulty, or damaged equipment will cost your company time and money; two things you can’t afford to waste.
Even if your mower has only been idle for 1 or 2 months, that’s enough time for fuel to go bad, oil to become contaminated, blades to rust, or other problems to crop up. Consult your owners’ manual for a list of seasonal maintenance items for your specific machine.
Service Tip 2: A Poor Cut
If you or your employees have been using the same mower for more than a couple of months, you are probably well aware of how it cuts as well as its overall capabilities. If you notice a sudden decrease in cutting performance — areas of the grass no longer looking uniform and smooth but appearing uneven or chopped — your blade could stand to be sharpened.
As long as the decrease in performance is not accompanied by a sluggish engine or poor power, taking your blade to be sharpened will return your mower to mint condition. Look for a more detailed story on sharpening and balancing mower blades here next week.
Service Tip 3: Engine Trouble
Your mower should have its engine serviced at least once a year. And while annual tune-ups are great, how do you know if something is wrong in-between recommended maintenance?
Pay attention to the way your mower’s engine sounds. A sputtering or uneven idle can mean the fuel-to-air mixture is not balanced properly. A decrease in power can mean filters are clogged. Excess exhaust smoke or strange smells might mean oil is mixing with the fuel, and could be a sign of larger issues inside the engine. Unless you know engines inside and out (literally), these problems are best left to the professionals.
Service Tip 4: Dirt and Debris
Is your fleet of mowers dirty? Are your mowers covered in mud, grass, branches, and other messes? If so, it’s time to tune and clean your fleet. When you run a landscaping business, maximizing efficiency and cutting extra costs are both musts. Excess dirt and debris, though seemingly insignificant, reduce mower efficiency. A bit of mud near the axles, grass stuck to the blade, and branches jammed in the bodywork will each have a small impact on how much fuel you use and how long it takes to mow a given lawn. Add up all of those small issues and you will see a significant increase in not just running costs, but also machine wear over the course of a season.
DIY or Send It In?
Depending on how familiar you are with your mower, you may be able to do much of the maintenance on your own. Here are just a few of the things you should be able to do at home or in your shop:
- Changing your mower’s oil is a relatively straightforward process. Most mowers have an oil tank that can be emptied by removing a cap (in a process very similar to changing a car or truck’s oil). Just make sure to do this outside or over a cloth and bucket.
- Changing an air filter is simple enough for anyone to do. Most mowers, whether commercial or walk-behind, have easy-to-access filters mounted near the engine. All you typically need to do is remove the cap, pull out the old filter, and insert a new one. Just make sure you insert it in the proper direction, and consult your engine owner?s manual with any questions.
- Replacing a spark plug is easy, assuming you have a spark plug socket wrench. Just make sure plugs you install are properly gapped for your specific mower.
More involved maintenance is often better left to a qualified service professional. If you don’t feel comfortable tackling something on your own, don’t do it. You will lose more money fixing a mistake than sending it to the dealer to begin with.
Saving Money with Regular Maintenance
Here at Exmark, we make a wide range of modern mowers and lawn care tools that dramatically increase efficiency to help you get more work done using fewer resources. Whether you have a top of the line Exmark mower, or an older machine, maintaining what you have is one of the best ways to save money. Make sure you tune your mower this spring and repeat as often as necessary. Doing so will not only save you time and money, but will prevent more costly problems in the future.
It’s Time For Fall Mower Maintenance
Thursday, September 25th, 2014As the calendar moves from summer to fall, it makes sense to turn your attention to maintaining your mower. Proper maintenance is essential to the longevity and performance of any mower, and proper service ahead of extended storage ensures the performance you enjoyed this season will carry forward to the next.
Start clean
It’s important to start a period of storage with a clean mower, as any debris left on the mower will either trap moisture or become fodder for a rodent nest. It’s also easier to inspect and perform necessary service prior to storage when you’re not working through a thick layer of dust and debris.
Never use solvents to clean your mower, and minimize the use of water as well. Instead, use compressed air or a leaf blower, and finish by wiping the exterior surfaces with a damp cloth. Take your time and clean the mower completely, including under the seat, under the deck, behind the wheels and around the engine and drivetrain.
Examine Your Machine
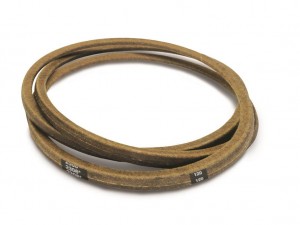
Refer to your owners manual or to Exmark.com for information about specific service schedules, but once your mower is clean, inspect it for clear signs of wear and tear and replace any parts that are at the end of their life cycle. Checking and servicing or replacing normal wear items such as belts, tires, blades and other parts restores mower performance and ensures safety and long life. Plus, replacing worn parts prior to storage gives you the opportunity to get a quick start on the next season, as your focus won’t be distracted by service related issues.
Sharpen Blades
The efficiency and quality of cut your mower delivers is highly dependent on sharp blades for top performance. After a hard season of mowing, it makes sense to sharpen your blades. In doing so, you can be confident your mower will hit the ground running when it comes out of storage in the spring.
Focus on Fuel
Extended storage can wreak havoc on an unprotected fuel system, so prior to storage it’s important to either drain the fuel tank (and system) completely, or add stabilizer to the fuel. If you go the fuel stabilizer route, be sure to run the engine for a few minutes after the stabilizer is added. This will distribute the treated fuel throughout the fuel system to keep it clean and deposit free during storage.
Remove the Battery
When storing a mower for extended periods, it’s a good idea to remove the battery from the machine and store it in a climate controlled area (preferably at 50-70 degrees F). Not only will this preserve battery condition, it will ensure that a leaking battery doesn’t cause corrosion to the mower frame during storage. Learn more about caring for batteries in this post from Exmark’s David Martin.
Fresh Lube is Good
Lubrication is the life blood of your mower, and it’s important to refresh all lubricants prior to extended storage. This includes changing the engine oil and filter as well as the hydro (drive) fluid and filter, and greasing all zerk-equipped bearings on the machine.
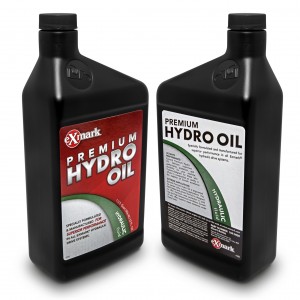
Take your time when lubricating your mower, as it’s important to remove any load or binding from bearings being greased. This ensures lubrication reaches the entire bearing instead of just a portion of it. Also, inspect bearings for wear and/or play, and replace any bearings that have been compromised in any way.
Storage Considerations
Regardless of where you store your mower — in a barn, under a waterproof tarp, or in an inclosed trailer — it’s just as important to keep rodents at bay as it is to keep the elements out. There are a variety of traps and chemicals to choose from, and natural solutions such as oil of peppermint or Osage oranges can also be effective at keeping your machine free of vermin. It’s important to avoid the use of harsh chemicals on your machine, as many can cause damage to its finish, or to specific components. Your local Exmark dealer can be a good resource for suggestions to control rodents specific to your area.
Keeping moisture at bay is equally important. Store your mower in a place where snow, rain and ice can not reach it. Rust can appear quickly on stored machines left out in the elements, so keeping your mower in a well-protected place preserves not just its longevity, but also its performance.
Learn more mower service tips at http://www.exmark.com/ServiceTips.aspx. Locate the service schedule for your Exmark machine at http://www.exmark.com/MaintenanceSchedules/.
Exmark Simplifies Equipment Management with MyExmark.com
Thursday, May 1st, 2014Online application uses a QR codes to deliver maintenance schedules, specifications and more
With the launch of MyExmark.com, Exmark has made the process of searching for equipment information dramatically easier. The new application uses QR code scanning technology to give landscape maintenance professionals the ability to quickly learn more about their machines, including information about service, dealers, specifications and more.
“We launched MyExmark.com to help our customers manage their equipment more efficiently and effectively, and to keep equipment operating at peak performance,” said Exmark Director of Marketing, Daryn Walters. “Our 2014 equipment includes a QR code next to the serial number on the model plate. When the QR code is scanned, it takes the owner directly to detailed information about that piece of equipment.”
Using one of the many free QR code scanning applications available for smart phones, Exmark owners can quickly access a wide range of information about their equipment by scanning the QR code located on the model plate, including
- Equipment specifications
- Detailed maintenance schedules
- Contact information and maps to local Exmark dealers
- Warranty information
- Special offers from Exmark
When an Exmark owner scans the QR code on a piece of Exmark equipment, they are taken to the MyExmark.com website, and are asked one question: “are you the current owner?” Once ownership is verified, the Exmark owner is taken to a whole new level of product information.
If a QR scanning application is not available, owners can access the same information by entering the serial number of a piece of equipment in at MyExmark.com. The site also tracks all of the Exmark equipment in a fleet, including machines built prior to 2014. If a piece of equipment is sold or retired, its information can be hidden from view. Owners can also report a piece of Exmark equipment stolen on the site.
Learn more about MyExmark.com by visiting the site, or on YouTube
Maintaining Your Cutting Edge
Thursday, September 12th, 2013A little maintenance goes a long way when it comes to keeping your Exmark cutting system performing at its best. In the heat of the cutting season, while you’re focused on cutting grass, it’s easy to let blade and deck maintenance intervals slip. It’s a common challenge, but when it comes to cut quality and cutting efficiency, it pays to keep blades sharp and belts tight.
Blade maintenance
The sharpness and overall condition of your cutting blades are extremely important to the performance of your Exmark mower. Here’s why: instead of cutting cleanly, dull blades tear blades of grass instead of cutting them cleanly, increasing susceptibility to dieback and pests. And due to their inability to efficiently cut grass, dull blades also increase the load on the engine and powertrain of a mower. This decreases fuel economy and increases component wear, leading to increased service costs and ultimately, a reduced lifespan for the mower.
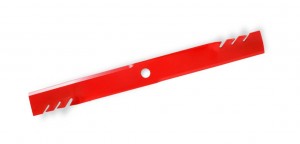
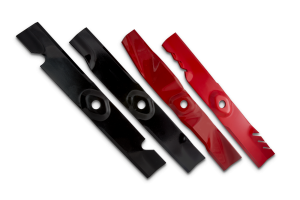
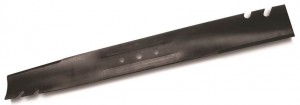
For landscape contractors, the lost efficiency and increased wear and tear can significantly impact profitability. As a result, it pays to inspect the blades and deck each day, and sharpen/balance blades every 10- to 50-hours, depending on cutting conditions. Be sure to replace any blades that show excessive wear, especially where flat and curved parts of the blade meet. If significant wear or slotting is observed (see Figure 1), replace the affected blades with appropriate Exmark Original Equipment (OE) before mowing again. Exmark OE blades are engineered for specific cutting conditions and their use preserves the performance and long-term durability of the Exmark cutting system.
Figure 1: Replace worn blades if you observe signs of wear or slotting.
Since cutting conditions vary, it’s tough to predict exactly when blades will need sharpening, so many contractors will keep an extra set of sharp, balanced blades in the truck, ready to be rotated-in at a moment’s notice. That way they can continue cutting uninterrupted and can wait until they get back to the shop to sharpen and balance the blades.
Belt and idler pulley maintenance
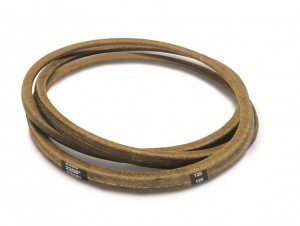
Belt tension is an issue that Exmark users really don’t need to worry about, since the belts are self-tensioning. Because of this, service is reduced to checking the condition of belts every 50-hours and replacing as necessary.
Because belts stretch most when they’re first installed, it pays to stay on-top of belt tension adjustment on mowers that lack an automatic tensioner. Running a mower with loose belts significantly decreases the lifespan of the belts, so check their tension three times in the first 24 hours of use following installation, adjusting as necessary. After this break-in period, check belts every 50 hour of use, adjusting when tension drops below the specification in the owner’s manual.
It’s easy to check belt tension with a ruler and a fish scale. Simply hook the fish scale around the belt and pull, using the ruler to measure the belt’s deflection. Some Exmark belts are specified to run at ½-inch of deflection under 10-pounds of pressure. At this tension, a 10-pound load on the belt will move it ½-inch.
Idler pulleys should be clean and free of debris. An easy way to extend the life of idler pulley seals is to spray them periodically with spray lubricant. Exposure of the seals to the sunlight’s UV rays can harden the seals, reducing their effectiveness. A quick squirt of spray lube periodically keeps the seals soft and supple and helps them do a better job of keeping dirt out.
Of course, keeping the cutting deck clean and free of debris is extremely important to the overall efficiency of an Exmark mower. Each day, as you check the condition of cutting blades, be sure to also check the mulch build up under the deck, cleaning as necessary.
Visit Exmark.com for more information, tips, product manuals, maintenance schedules and more.
Battery TLC during mowing season
Wednesday, April 6th, 2011Sometimes batteries get ignored during mowing season until the day your mower refuses to start.
Here are a few things you can do to show your battery a little love and help keep it going throughout the season:
- Check your battery’s fluids at least once a month. If you live in an area where summers are scorchers, check fluids weekly. If they’re low, only use distilled water.
- If your battery can’t seem to hold a charge, try removing it from the machine and putting it on a trickle charger for a couple of days. It can refresh the battery.
- Make sure your electrical system isn’t overcharging the battery. If your mower’s fuses are blowing and there’s no good explanation for it, it’s a sign your electrical system needs to be checked. Your Exmark dealer can run a fairly quick test to see if the system is working properly
This post by David Martin, customer service manager at Exmark.
Mower TLC
Thursday, February 3rd, 2011For those of you that haven’t had a chance to check out some of our older posts about maintenance for your Exmark, here’s a refresher. Sure, your Exmark mowers are tough machines, but even the metal beasts need to be shown a certain amount of care to keep giving the results you and your customers are looking for. Here are a few ways to help your equipment get the job done right.
- Change the gas and oil soon after taking out your mower. Gas that has been sitting in the tank throughout the winter becomes lower in quality and has a tendency to go stale faster, causing damage to your mower.
- Check the blades before any big job. Seriously. Do it. With a little practice, you can change a set of blades and be mowing in less than five minutes, and the higher quality cut is sure to impress.
- Give your mower a good cleaning inside and out since grass clippings can often hide out of plain sight. It may require a little more work, but in the end better airflow through the deck will deliver more of the cut quality you’ve come to expect.
- It’s not exactly manly, but reading the manual is essential for proper care of your equipment. Even if you’re a mower maintenance guru, the difference from one model to the next can be staggering.
- If something does go wrong, call up an expert. A few well spoken words of wisdom can save a do-it-yourselfer from hours of headache.
See? It doesn’t take that much to keep your mower happy, which, in the end, will keep you happy.
We’d love to hear how you keep your mower in tip-top shape.
Leaf removal – the sequel.
Tuesday, November 23rd, 2010So we asked, and we received. In our last leaf removal post, we asked you to share some of your favorite tips and techniques with us on leaf removal. We’re glad to say we got quite a few responses – some creative, some pretty funny and others that we could see coming in quite handy. Thanks to all who shared!
And, rather than just picking one – we decided to go with a few of our favorites:
Mitch
I own an Exmark Turf Tracer HP. Usually I blow all the leaves out of the flower beds onto the lawn with my blower. Then I mow the lawn two to three times to mulch up the leaves. The mower is designed so well, it acts like a very powerful vacuum, sucking up the leaves and shredding them into tiny pieces! It doesn’t miss any leaves and I’m just using the normal Exmark blades. After I mow over the leaves two to three times, I attach my bagger and mow once, emptying my bagger every once in awhile. This works great for me.
Ryan McCallum
I own a Navigator. After blowing the leaves out of the gardens and tight areas I run over them with the machine equipped with the mulch plug to chop them up really fine. Then I take the plug out and bag as usual. Takes a bit more time but saves a lot of space on the trailer.
Rob Robinson
Blow out all the plant beds into the lawn and suck the leaves up from there. If there are a lot of them, it’s not a bad idea to grind the leaves up a bit to cut down on the amount you have to move.
Brennan Wright
Mulch kit probably the best investment I’ve ever made.
Ryan Nicola
The JRCO leaf plow works great moves lots of leaves quick leaving a thin trail behind which can easily be vaced up with a mower or blown easily with a good back pack blower.
Daniel Lane
For individual small yards, grab the biggest, thickest tarp you can, rake and blow the leaves onto it, and move by hand or tie off to your rider for the burn pile or truck.
Bonnie Lange Salonek
Ultra Vac – just got mine and I love it!
Kenny Farrell
Mulch over them with a Lazer and bag them up with a Turf Tracer.
Though we don’t encourage this behavior, the following posts made us chuckle a bit:
Joe Caron
Hire someone to do it for me!
Brian Smith
Cut down all the trees.
Justin Monnig
I’ve got all sorts of ideas, let’s see, how about use a speed blower or buffalo blower to move ‘em into your neighbor’s yard. No bagging needed. Then sit back in a lawn chair with an alcoholic beverage as your neighbor sweeps them up.
If you have more ideas you’d like to share, feel free to leave a comment below.