Archive for the ‘Education’ Category

Flood Lawn Recovery: How to Get a Lush Lawn Next Summer

Tuesday, December 27th, 2016
Lawn reovery after flooding

After flooding, these lawn recovery steps are important in order to get a lush lawn next summer.

If you were one of the many homeowners affected by flooding in 2016, you’ll have quite a bit of work ahead of you to return your lawn to its former glory. This is especially true for lawns that were either underwater for more than four days, covered with more than an inch of silt, or flooded by saltwater.

In these cases, the turf may be dead and require a complete removal and re-seeding. Hardier plants like trees, shrubs, Bermuda grass, Bahia grass, and perennials may survive being underwater this long, but there is no guarantee.

Despite the traumas your lawn underwent, there is still a chance it can survive—provided you take the necessary steps now in order to cultivate growth for next year.

Rebuild Landscape for lawn recovery

Flood Lawn Recovery will require you to rebuild the landscape and get your lawn back to its original proportions.

Step One: Rebuild the landscape. The first thing you want to do to restore flood damage is to get your lawn back to its original proportions (or as much as possible). Deposits of silt and debris often reshape your lawn, making it uneven with varying grades. Silt can be scraped off and worked into the soil (or, where there is too much of it, hauled away). Areas that were washed away can be filled in with topsoil. The more even and stable you can make the lawn, the better.

Core aeration for lawn recovery

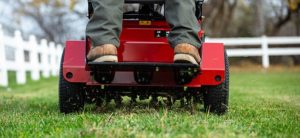
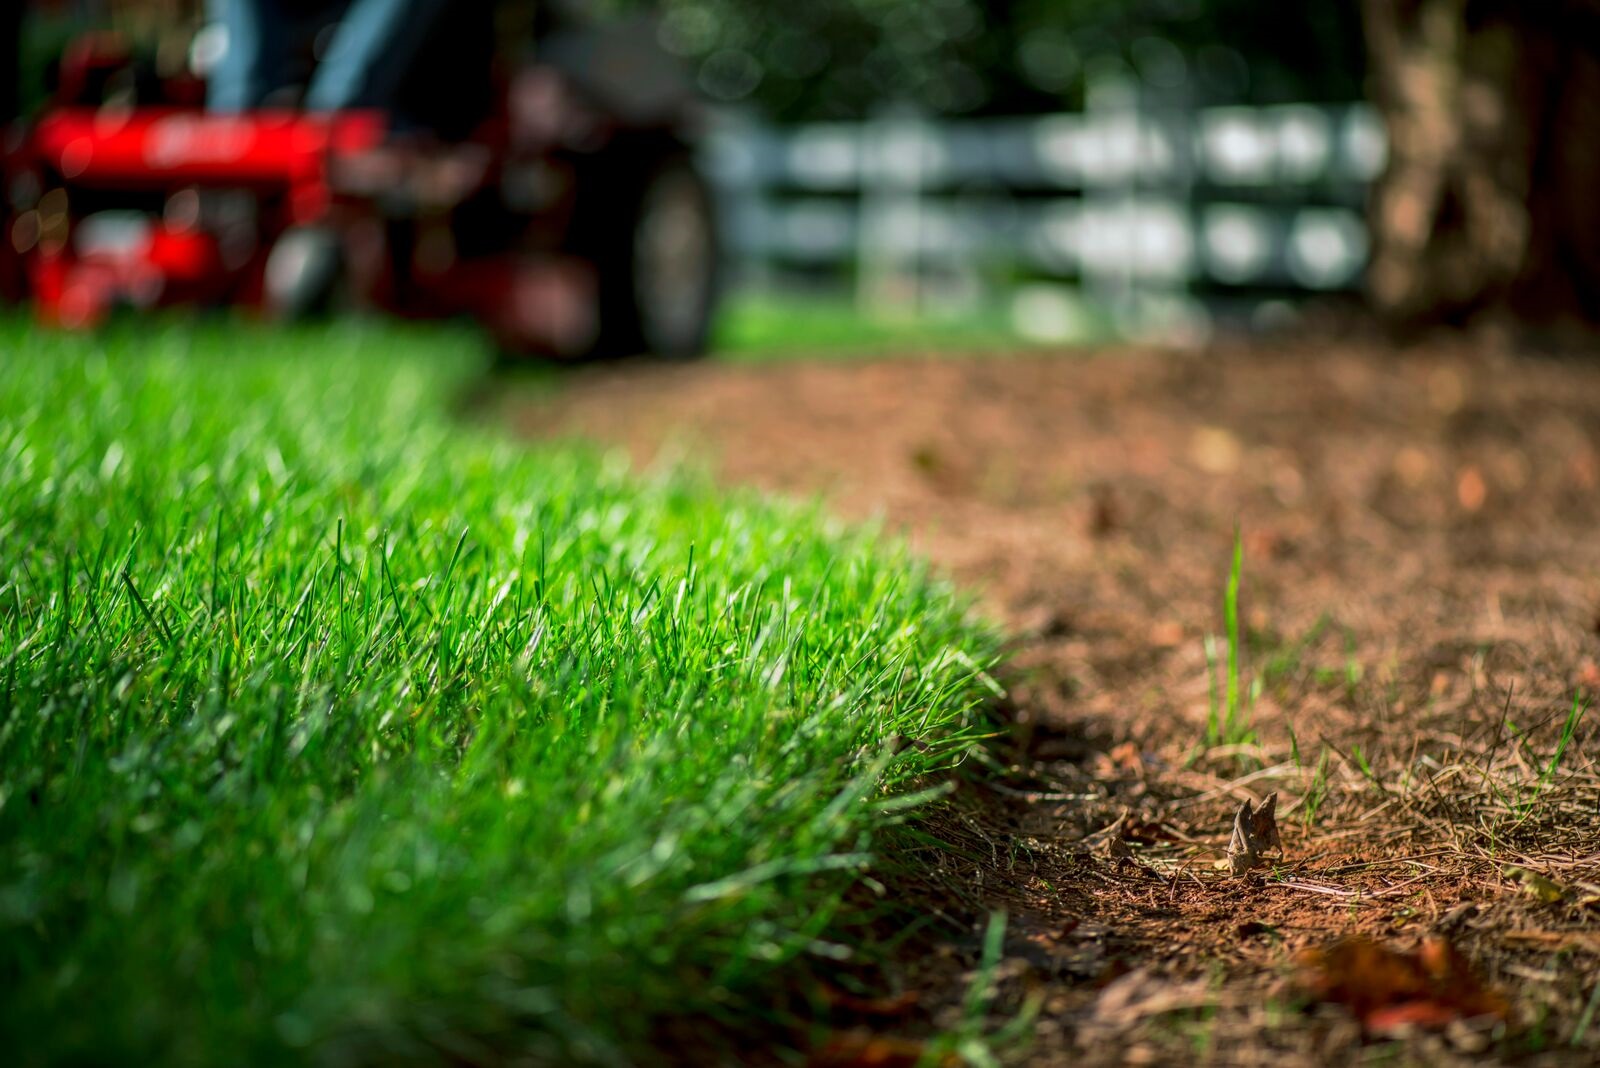
Core aeration is the best way to get oxygen and to dry up your yard during lawn recovery.

Step Two: Aerate the soil. More than anything else, your lawn needs a way to get oxygen and dry up, and aeration is the best way to do that. If aeration is normally a part of your fall maintenance routine, perform it soon after the flood waters recede instead. If it’s not part of your routine, now is a good time to start it. Get that lawn open and dried, even if it means you have to aerate several times this fall.

Note: If your flooding occurred late in the season, the first two steps are the best you can do for the year. Any attempts to recover your lawn in freezing conditions are likely to be met with few results. As long as the lawn is dried, even, and has good soil for next year, you can rest easy. Do what you can to limit foot traffic until the spring growing season, and avoid the use of any harsh de-icers that contain chemicals.

Exmark Spreader-Sprayer for lawn recovery

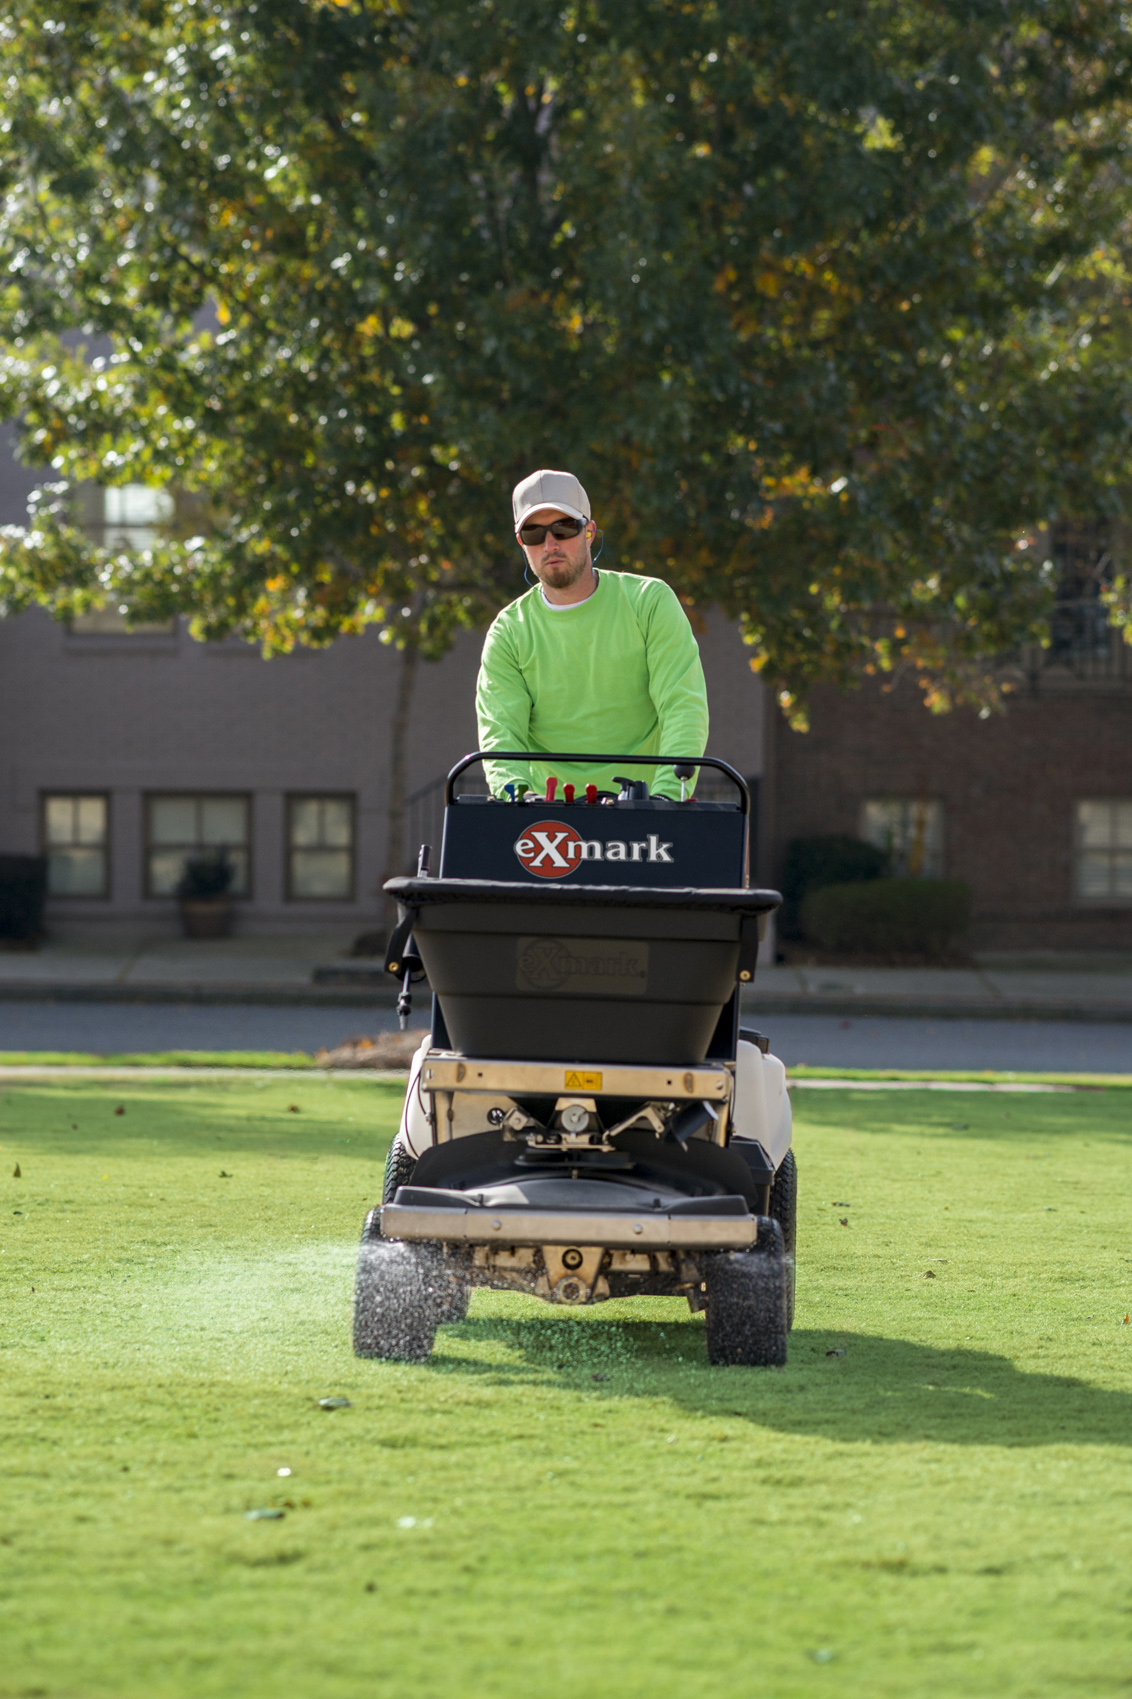
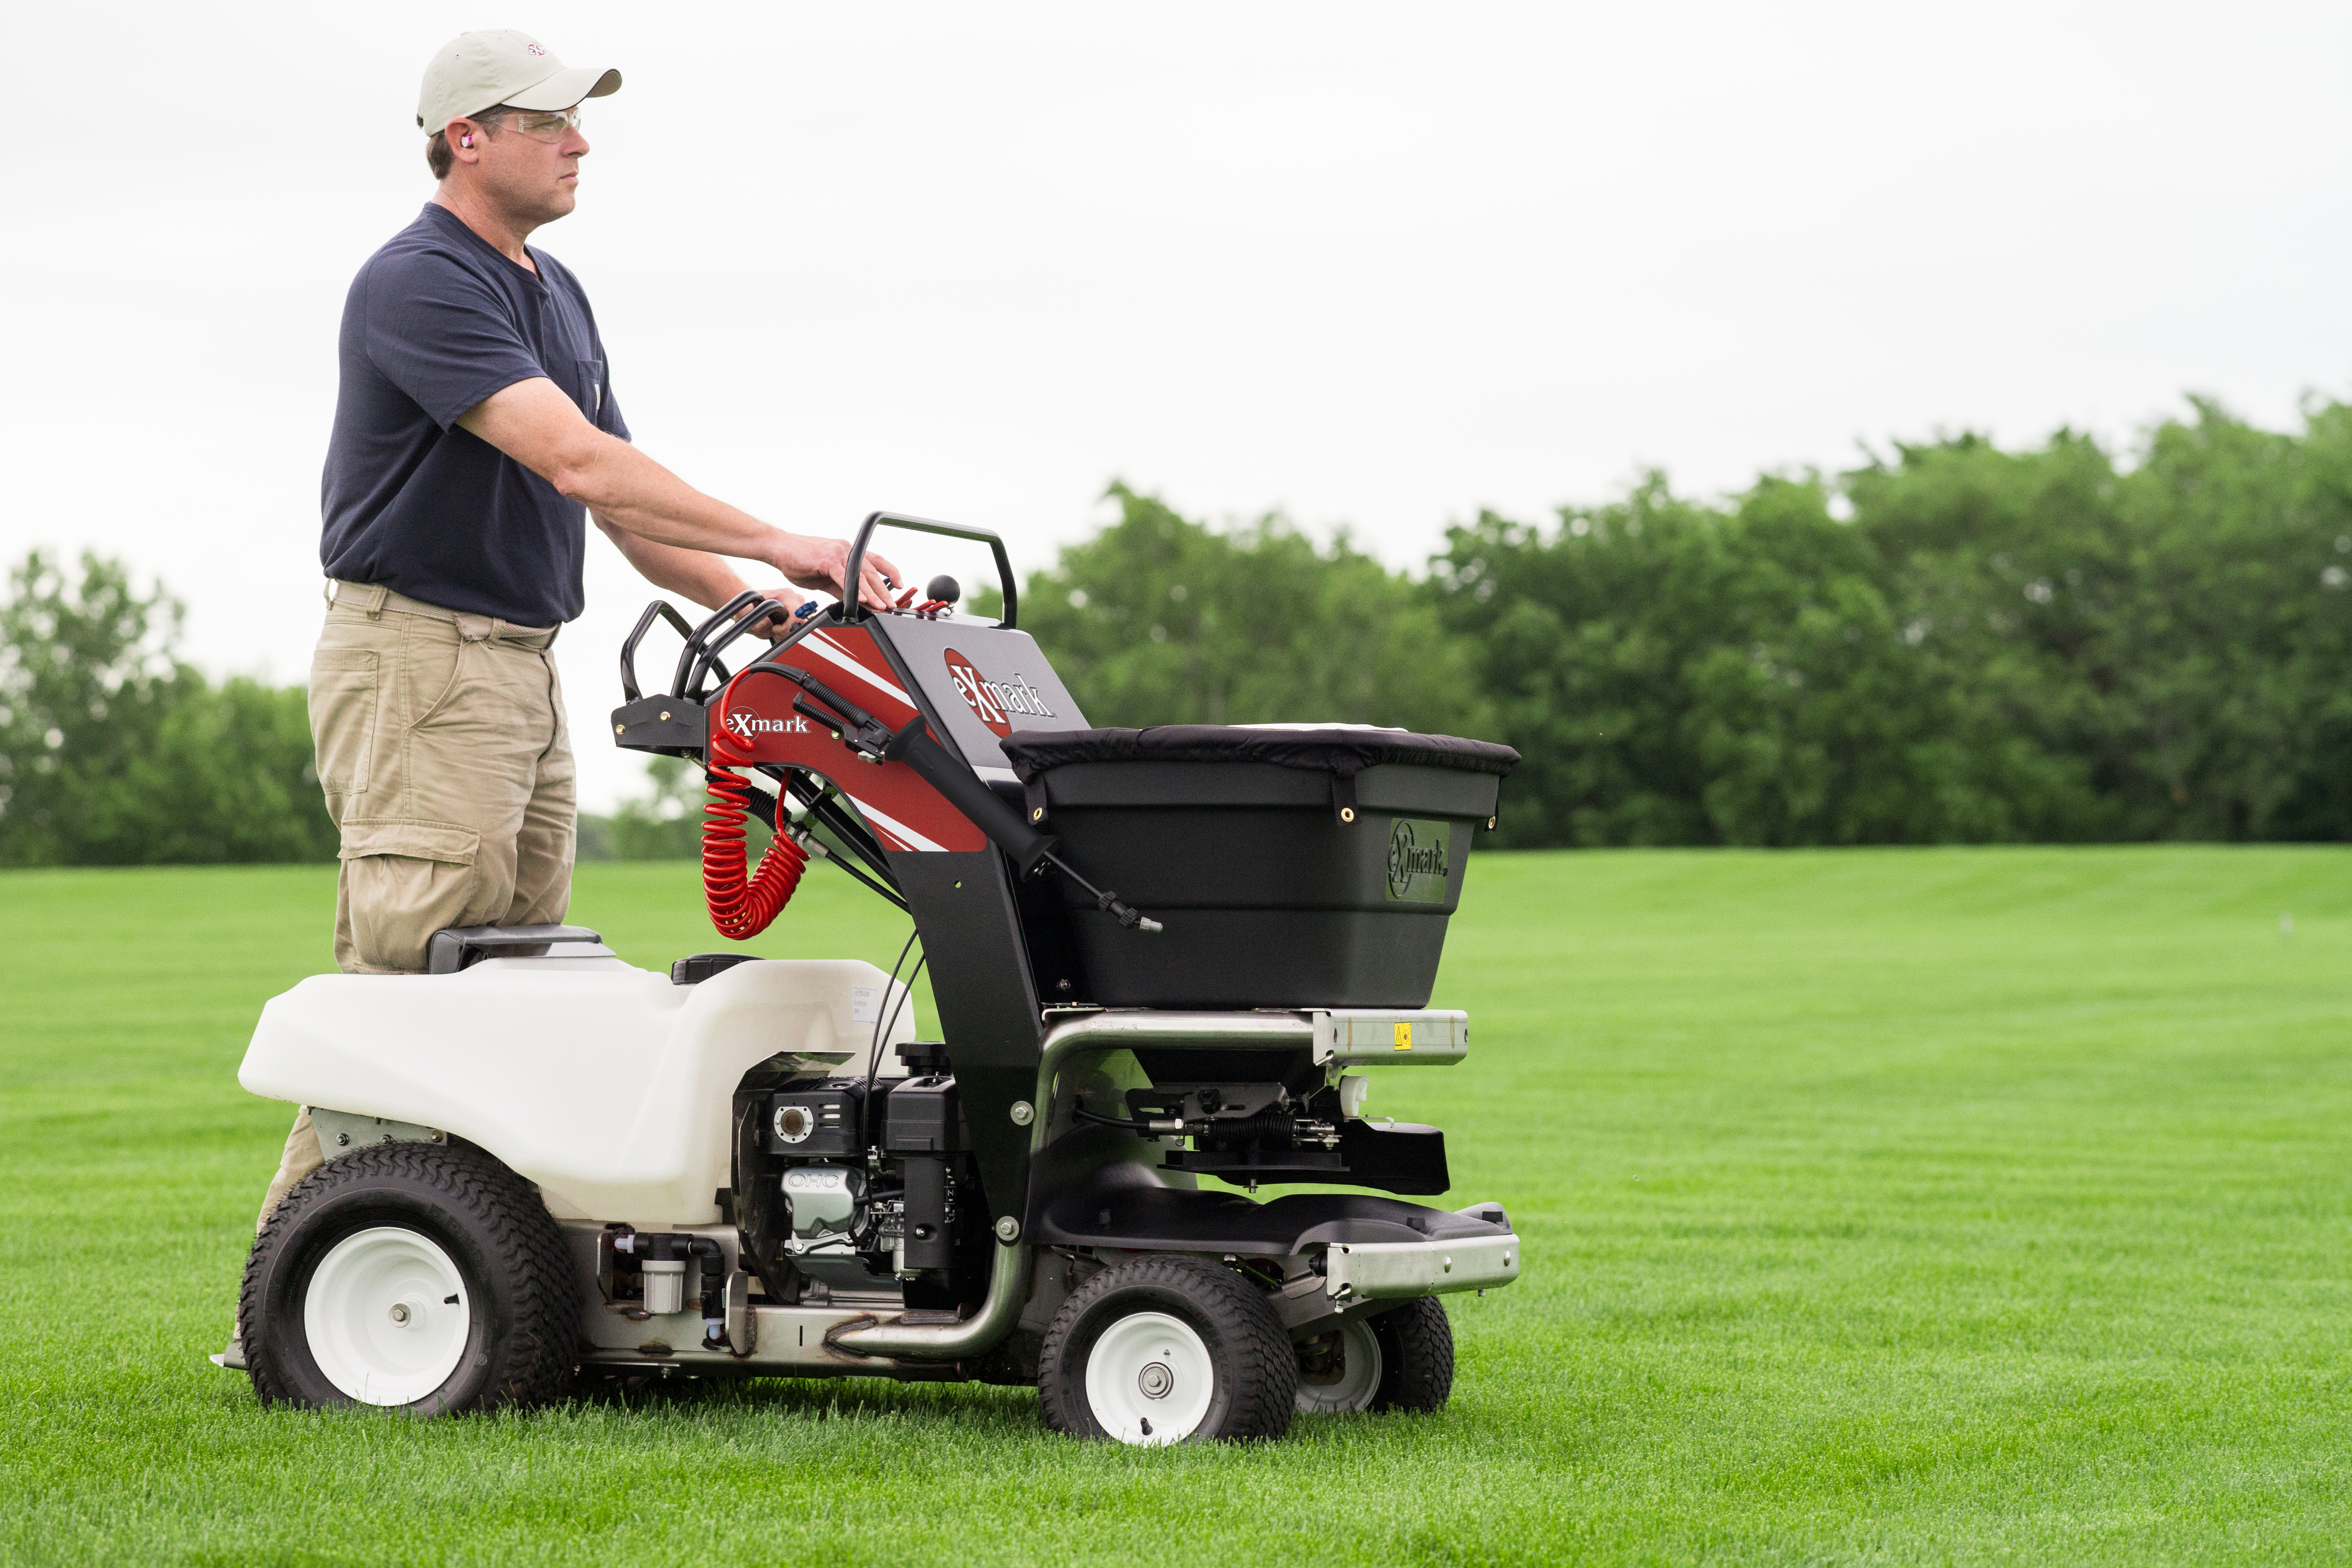
Full Lawn Recovery will fertilizer and seed. A Spreader-Sprayer will help evenly distrubute fertilizer and seed.

Step Three: Apply a starter fertilizer. Treat your entire lawn like it’s growing for the first time, and you can’t go wrong. This means buying starter fertilizers and planning for new growth just as you would a blank slate. Even areas with turf still growing can use a boost, so plan to fertilize and seed that area, as well.

Step Four: Seed and/or over-seed. Seeding is best done in early fall or late spring. Depending on the timing of your flood, you should plan this accordingly. If flooding is likely to return another time, look for hardier strands of grass that can stand up to the damage. Otherwise, choose one that’s right for your area.

Note: Applying sod is also a choice if you want to enjoy a green lawn without the bother of growing grass from scratch. In this instance, you want to ensure that the soil underneath is fully dry and capable of supporting new growth.

You’ll also want to take note of issues like pest growth, mosquitos, and standing water issues—not to mention damage to the sprinkler system or water that gets underneath concrete and freezes to cause breakage. For all these reasons, drainage and aeration remain the most important steps in lawn flood recovery. You should also plan to take it easy on the newly growing grass, making sure you never mow more than 1/3 of the length at any given time.

Getting Your Lawn Ready for Winter

Thursday, December 8th, 2016
A focus on fall maintenance helps you get a quick, trouble-free start next spring.

A focus on fall maintenance helps you get a quick, trouble-free start next spring.

Now that fall is coming to a close and winter weather is headed your way, it’s time to start thinking about lawn prep. In order to get the most out of thespring growing season, it’s important to take precautionary steps and make the most out of available mulching materials. Here’s how.

  1. Mow Often and Low: Most people slow down their mowing routines as fall hits, and that’s okay. However, you want to keep your grass no more than 1 to 1.5 inches high in order to determine how much composting and aerating you’ll need to do. Don’t shock the blades by chopping them all down at once. Instead, mow often enough and with gradually lowered blades to get the grass to the desired length without damage.
  2. Rake and/or Mulch the Leaves: Don’t let leaves take over your lawn and destroy what’s left of the growing season. Rake them, or mulch them in order to put the nutrients back into the ground. Mulching can also be beneficial when you want to protect your grass against rapidly decreasing temperatures.
  3. Aerate the Lawn: Aeration is almost always done in fall because it allows you to take advantage of looser, moister conditions to loosen the soil. For a healthy, lush lawns, professionals recommend annual aeration.
  4. Prep and Overseed: Now is the time to address bare patches in the lawn and overseed for next year’s growth. Ideally, this should be done six to eight weeks before the first hard freeze so new grass roots can get established.
  5. Remove Annuals: All those beautiful annual flowers you put in this year are ready to be removed. It can be difficult to say goodbye (especially if you put a lot of working into planting them), but it’s best to give the soil time to rest over the winter. It will also make it easier to plant anew next year.
  6. Protect Delicate Plants: If you live somewhere with heavy snowfall and cold temperatures, you may want to protect some of your more delicate and potted plants against the elements. Insulation can be as simple as mulch or leftover leaves laid over the top, or as complicated as carefully laid burlap over rose bushes.
  7. Close off Foot Traffic: Your lawn is more likely to survive the harsh winter if you keep foot traffic off. It’s very easy to turn a brown lawn into a mud pit if too many people take shortcuts over your grass. Keep sidewalks and walkways clear to avoid too much damage.


After your hard work is done, you can sit back and enjoy what’s left of your outdoor season. Winter lawn care tends to transition to winter sidewalk and driveway care, so it won’t be long before you’re pulling out the rotary broom instead of your lawn mower!

Why You Shouldn’t Let Fall Leaves Cover Your Grass

Tuesday, November 8th, 2016

By the time autumn rolls around, many homeowners are tired of lawn maintenance. After all, you’ve spent the entire summer watering, trimming, mowing, and taking steps to ensure your lush, green grass stays that way. And then the leaves start to fall.

Although you might be tempted to let the fall leaves stay on the grass for the winter, it’s rarely a good idea to let the leaves just lay there, and not because your neighbors might complain.

Leaf Lawn Damage

Fallen leaves have nutrients th at are great for enriching the soil. When they biodegrade naturally, they leave behind carbon, nitrogen, and other organic matter essential to plant growth. Worms love this stuff, and they pull it into the soil and leave behind worm castings that do even more to improve your lawn.

But this isn’t what happens when leaves are just covering the lawn. It takes leaves a long time to break all the way down, and when they fully cover the lawn, they limit the amount of sunlight and oxygen getting to the grass—something you really want, especially if you’ve recently planted grass seed. Large clumps of leaves can also create soggy piles that turn turf into mud, which is also less-than-ideal when you’re building up a lawn.

Many, if not most, homeowners rake the leaves into piles and haul them away. However, it’s a much better idea (and easier than raking!) to mulch the leaves. This way, your lawn retains the nutrients and stays neat and tidy. 

Why Mulch?

Mulching leaves (chopping them into smaller, more easily broken down pieces) is a great way to keep the nutrients without sacrificing aesthetics. By breaking the leaves into pieces so small they can’t be seen by the naked eye, you can keep everything looking neat. At the same time, these smaller pieces will break down faster, meaning you’ll get more nutrients at a faster rate—something that’s ideal when you’re prepping your lawn for winter.

Exmark rear-discharge

The decreased noise and increased clipping control of a rear-discharge mower are ideal for maintaining residential properties.

This process is also much easier than most people realize. Mow over the leaves and discharge the clippings over the lawn. Areas of especially heavy mulch deposit might require you to spread the debris by hand, but most of the work will be done by your lawn equipment. You can invest in micro mulching kits for your mower, but if you have an Exmark mower with an UltraCut Rear Discharge cutting system, you shouldn’t need one. The excellent clipping control mean you can decide where the mulch will be deposited.

Don’t Let Your Leaves Lie All Winter

Leaves left on the lawn during fall will soon become frozen clumps during the winter, and be soggy piles in the spring. Get ahead of your maintenance game this year by mulching your leaves. Your grass will thank you—and so will your neighbors!

Do You Really Need to Fertilize Your Lawn?

Thursday, October 20th, 2016
Finished Lawn

Fertilizing your lawn should be part of your regular, comprehensive lawn maintenance plan.

If you care about keeping your lawn looking lush and green for as long as possible, you’ve probably used (or considered using) fertilizer. After all, when things start to look patchy and dry, it’s an issue of not enough nutrients in the soil, right?

Not necessarily. Although there are times and situations when fertilizing your lawn is the right choice, it’s not a universal cure-all. Instead, it should be used as part of a regular, comprehensive lawn maintenance plan that takes all parts of the grass life cycle into account.

Types of Grass

The type of grass in your lawn of will be the number one indicator of when and how you should fertilize. Because the best time to fertilize your grass is during its peak growing season (in the same way animals and people need extra nutrition during their growth spurts), it’s important to know when your lawn is expected to put in the most work. Cool-season grasses (typically found in northern states) tend to grow most in the early spring and fall. Warm-season grasses (typically found in the South) will do more of their growth in the humid heat of summer.

Things start to get tricky when you have a mixture of both these types of grasses, so it’s important to tailor a fertilization schedule to your exact lawn.

Fertilizer Contents

No two fertilizers are created equally, so it’s important to know what’s going in yours. Most fertilizers are composed of some combination of nitrogen, phosphorus, and potassium—as well as a few other nutrients like iron that grass needs to stay healthy. However, too much of one ingredient (especially nitrogen) at the wrong time, and you could end up damaging the grass. Because nitrogen stimulates top growth, it can end up taking nutrition away from the roots or causing off-season growth.

Fertilizer Alternatives

Another issue to take into account are other, more natural alternatives to fertilizing a lawn. For example, the mulch left in grass

clippings contains natural nitrogen, phosphorus, and potassium. By allowing grass clippings to remain on the lawn, you can re-introduce these minerals without resorting to fertilizer.

Exmark core aerator

Core aeration can be beneficial for most lawns if performed at the right time for the type of turf grass you’re working with.

Other options include aeration, over-seeding, and timing your water cycles. Aeration, which perforates the soil with small holes, helps introduce oxygen, water, and fertilizer nutrients into the lawn. Over-seeding gives your lawn a chance to appear more lush and thick. Watering the lawn can also make a big difference, especially when it comes to cool-season grasses, which often go dormant in the heat of summer.

Depending on your lawn goals, any and all of these efforts can make a difference. With the right planning, a fertilizer can be used alongside other types of lawn maintenance to create the most desirable, green finish possible.

Fall Lawn Care Schedule

Thursday, October 13th, 2016

If you’re lucky, you’ve spent most of 2016 enjoying a beautiful green lawn rolling off in every direction. If you’re not so lucky, and your lawn is less like a rolling landscape and more like a DIY project, there’s still good news—fall is the perfect time to start a new lawn care schedule.

You don’t have to buy tons of tools or lawn care equipment (though it helps!), as long as you follow a few suggestions on timing for making the most out of your yard.

Early Fall

Exmark 30inch Stand On Aerator

By aerating your lawn and loosening the soil, you can better prepare the grass for a healthy lifecycle.

Early fall is an ideal time to tackle those bare spots, thin patches of grass, and dead areas in your lawn. If you have warm-season grass, you’ll want to do this while temperatures are high; for those with cool-season grass, it’s best to wait until the weather isn’t so hot.

Start by loosening the soil in the patchy areas either by hand or using an aerator. From there, you can remove the dead grass and add rich compost to create the best growing bed. Sprinkle grass seed, moisten the area with mulch, and be sure to apply water to help the grass seeds take root.

Early fall is also a great time to take care of any lingering weed problems. New compost and heavy water applications aren’t just ideal for grass growth—they also promote the development of weeds. By taking the time to get rid of any weeds now, you can tackle the rest of your lawn care without worry.

Mid-Fall

The middle of fall is when you want to aerate and over-seed your lawn for next year’s growth cycle. To take care of a full yard, you’ll want to use equipment from our Exmark aerator line and lawn spreader sprayer equipment, as these tools are designed to get beautiful results over a large surface area.

Exmark commercial-grade lawn sprayer

Seeding is important during mid-fall as the fall burst of growth in cool-season grass is some of the most natural and easy to take care of.

By aerating your lawn and loosening the soil, you can better prepare the grass for a healthy lifecycle. Seeding is also important during this time, as the fall burst of growth in cool-season grass is some of the most natural and easy to take care of.

Although you may be tempted to fertilize and mow at this time, it’s important to give your new fledgling grass a chance to take root. Stay away from the fertilizer altogether, and focus instead on things like edging and trimming.

Late Fall

As the cool weather continues, you’re going to start seeing a lot of debris and leaves falling from nearby trees and bushes. Your main job now is to keep that debris from covering your lawn and preventing sun and water from getting to the grass and roots.

A mulching mower will go a long way in breaking up the leaves and organic matter without damaging the grass below. This mulch is also a great way to put nutrients into the soil without introducing fertilizers, so take advantage of as much (or as little) of it as you want.

Fixing Bare Patches in Your Lawn

Thursday, September 1st, 2016

Few things are more frustrating than to seed, water, mow, and maintain your lawn only to have bald patches ruining the overall effect. These dead, dry brown spots tend to crop up during the summer months, which is why now is a good time to take care of them.

Don't mow when grass is wet, or in the midday heat.

Take care of lawn patches now to keep your lawn at its best.

Causes of Lawn Patches

In order to get rid of your problem for good, it’s important to identify what caused the bare spot. The most common (and easiest to repair) reason is high foot traffic. Paths for humans or animals can wear down over time, and until you create an alternate walkway or put up a barrier, the grass isn’t likely to come back.

Other causes of bare patches in your lawn may include:

  • Drought
  • Under-watering
  • Disease
  • Pet waste
  • Chemical burns
  • Excessive weeds
  • Insect Infestation
  • Fungus

If necessary, treat the underlying cause of the problem first. Depending on your situation, this may require that you apply chemical treatments, hire an exterminator, or wait until water restrictions in your area are lifted.

Conditions for Re-Seeding

Late summer/early fall is a good time to fix bare spots, but if you’re doing this later in the fall or early in the spring, remember that ground temps need to be at least 52 degrees for seeds to sprout. Grass also prefers a clean slate on which to grow, as it’s not great at competing with weeds for space. Most experts suggest that you take the following steps to prepare the spot in your lawn:

  • Remove the dead turf and other plant life. Depending on the size of your patch, this can be accomplished with a spade or a larger shovel.
  • Clear any large rocks or clumps. The smoother the soil, the better the chances that your new grass will take hold.
  • Add topsoil. Because you’re likely removing an inch or two of dead turf and debris, you’ll need to add fresh topsoil to keep your lawn smooth and level.

Re-Seeding Your Lawn

Always choose a grass seed mixture that matches your existing lawn or that thrives in your area. Different grasses need different conditions, and you’ll get the best results by keeping your local climate conditions in mind. From there, you’ll want to:

  • Generously seed the area. You can sprinkle seeds by hand, or use an applicator for larger patches.
  • Apply a mulch. Grass seeds tend to be delicate in their early stages, so you’ll want to help keep it moist and prevent birds from eating it. Many grass seed brands come with mulch included, or you can use a material like straw.
  • Water twice a day until the seeds sprout. Morning and evening are the best times to water. After the seeds sprout, reduce the watering to once a day.
  • Fertilize the grass. Most fertilizers are too strong for new grass, so you’ll want to wait until you have a healthy growth before you fertilize.

Because you want to give your new grass a chance to thrive, it’s also a good idea to restrict walking and mowing/lawn care in the area. By the time fall arrives, you should have a nice, strong, consistent lawn and you can resume regular lawn maintenance.

How to Get Rid of Common Lawn Pests

Tuesday, August 30th, 2016

Few things are worse than putting time and effort into trimming, mowing, and maintaining your lawn only to have it overrun by common pests. Part of any good lawn care routine will include a plan to reduce and/or eliminate the insects and rodents most common in your area.

Keep your lawn looking its best!

Eliminate the insects and rodents most common in your area to keep your lawn looking its best!

Depending on where you live and the type of lawn you have, you may encounter any of these destructive beasts.

Grubs

Although there are technically dozens of different kinds of grubs (the larvae of beetles) that vary by region and climate, they all tend to operate the same way when it comes to damaging your lawn. They feed on the nutrient-dense roots of grass, which causes the grass blades to die and create large brown patches. You can typically tell when grubs have taken over your lawn because the dead patches will lift from the ground like a carpet.

When grubs are large enough, you can actually pick them out from underneath the turf and remove them. However, most people turn to pesticides, which provide longer-term treatment to stop the cycle of reproduction. Dry grass (due to drought) and predatory nematodes can also help control grubs, as these will cause them to die naturally.

Moles

While moles might help with grub control, there’s no denying they’re one of the fastest ways to destroy a lawn. Not only do they burrow under the ground, causing holes and damage to the physical structure of your grass, but they feed on earthworms, which are needed to help aerate the soil, keeping your grass lush and green.

Getting rid of moles almost always requires the help of a professional. Because these are larger mammals, they must either be physically removed from the area or have baited traps set out to capture or kill them. Although you can try pouring chemical deterrents in their mole hills, many of these substances end up hurting your lawn more than they help them.

Grasshoppers

Grasshoppers might not seem like a huge nuisance, but anyone who’s had them descend on their lawn en masse knows how quickly they consume everything in sight. They love dry areas with lots of overgrowth, which means they’re especially damaging in areas that may have undergone neglect recently. From there, they move from yard to yard, eating all that they see.

Because of their love of dry areas, a well-watered lawn is actually a grasshopper deterrent. So is a well-mowed lawn, as the shorter grass doesn’t give them (or their eggs) a safe place to hide. These natural ways of controlling grasshoppers are better than pesticides, because by the time you apply them, the damage may already be done.

Chinch Bugs

Chinch bugs like sunny patches of lawn, where they bite into individual grass blades, sucking moisture from the plant and injecting toxins that cause it to come loose. Because they hide in the thatch layer, dethatching is good at preventing them. Pesticides and insecticidal soap can help eliminate them once they’ve taken hold in your lawn.

Other insects that damage lawns include mole crickets, beetles, aphids, cutworms and more. As is the case with most lawn care efforts, prevention is your best cure. By taking good care of your lawn and paying attention to any new or growing dead areas, you can control most pests before they get out of hand.

Keeping Track of Hours Mowed

Thursday, August 25th, 2016

A lot of lawn maintenance companies start out as just one or two guys with a lawn mower and a desire to set their own hours. Although you can begin a landscaping company with a more concrete business plan (and many people do), it’s not uncommon for businesses to start out small and grow much larger as demand increases.

This kind of growth is exciting, but it also means you’ll have a lot more paperwork and maintenance to do. That’s why we suggest tracking hours mowed from the very start. It doesn’t matter whether you have two clients or two hundred—this kind of smart record-keeping will help you with billing, lawn mower maintenance, legal settlements, and more.

Hours and Billing

The reason most landscape companies keep track of hours is for billing and invoice purposes. Some companies charge their clients by the hour, which means you need to know exactly how long your team spent at the work site. Other companies bill at a flat rate, but only know what to pay their own employees based on the hours they put in.

By keeping careful logs that include time spent on maintenance, loading and unloading equipment, drive times, lawn care, and regular breaks, your whole company can run on a tighter schedule. You’ll make better business decisions when you have data to base them on. Additionally, a log of times and places worked will be helpful in case of disputed payroll or complaints about work.

Methods for keeping these kinds of records depend on your business style. While you can opt for keeping paper logs or designing your own spreadsheet, more and more companies are choosing automated GPS systems and apps that allow remote employees to log their activities from their smartphones.

Preventative Mower Maintenance

We all know that mowers need regular maintenance and tune-ups the same way a car does, but not everyone remembers that total hours of run time and heavy usage impacts longevity of your equipment. Unless you keep exact records of when, where, and how long each mower was used, chances are you’re greatly underestimating the usage it undergoes.

Although these estimates vary depending on the make and model of the mowers you use, most maintenance schedules follow these general guidelines.

Oil and Oil Filters: Most mowers need an oil change every 50 to 100 hours. Filter replacement can be done less frequently, at about every 100-150 hours.

Air Filters: Because large amounts of dust, dirt, grass, and other debris are kicked up when a mower is in use, air filters need to be replaced fairly often. Depending on the type of air filter, this may need to be done as often as every 25 hours, or as infrequently as every 100 hours.

Spark Plugs: Most mower manufacturers recommend new spark plugs every 100 hours of use.

Blade Sharpening/Replacement: Mower blades take some of the biggest hits when it comes to commercial lawn care, with sharpening and/or replacements required every 8 to 20 hours. For those who perform lawn care full time, this may mean daily maintenance.

With all of these varying maintenance schedules, tracking hours mowed will help you keep on top of whether your machines need just an oil change, or a couple of different types of maintenance. Since proper maintenance is key to keeping mowers running, the benefits to your business will outweigh any hassles.

These logs also let you know when your mower might be approaching the end of its warranty or when it’s time to purchase new equipment. This can be a great help as you budget for the new equipment, since you’ll have a firm idea of what your average cost per hour is—and what you can spend to improve that outcome even more.

Hot Weather Lawn and Grass Care

Tuesday, July 26th, 2016

EX16_Pioneer_S-Series_InUse_6_web72With temperatures soaring well above 100 degrees and drought advisories in effect across the country, summertime lawn care can be a challenging task. However, maintaining a healthy lawn is not impossible—especially if you have the right tools for the job and know how to manage turf in the heat of summer.

From changing your mowing times to adjusting your mower to meet your lawn’s demands, here are a few tips for taking care of cool-weather grasses in seasonally high temperatures.

Set Your Mower Blades Higher: Longer grass tends to hold moisture better than short grass, especially in areas of high sun exposure. Instead of setting your lawn mower blades to remove the top 1/3 of the blade, raise it even higher. Although you’ll have to mow more often to keep your yard looking neat and trim, the higher cut will help the grass be less susceptible to stress.

Change Your Mowing Time: In order to minimize the stress on your lawn, plan to mow either early in the morning or late in the evening (provided your neighbors won’t mind). You might also want to mow after a rainfall or good day of watering. This way, you can avoid inadvertently causing stress to the grass from the combination of shorter grass and midday heat. You should also make sure your blades are sharp and working well. Dull mower blades can add an unnecessary strain on the grass, as they can cause tearing.

Mulch Grass Clippings: Instead of bagging or blowing the grass after you mow, mulch the clippings back into the lawn to become part of the life cycle. These nutrient-rich clippings provide moisture and other necessary nutrients to help keep your lawn healthy.

Avoid Foot Traffic: Keep your kids and pets off of any grass that’s struggling under stress. The less traffic you allow on your lawn, the better it will look overall.

Research Grass Varieties: Cool-season grasses include varieties like fescue, bluegrass, and rye. Warm-season grasses include zoysia, St. Augustine, centipede, and Bermuda. Cool-season grasses tend to fade a lot faster once temperatures move up over 60 degrees, and are much more likely to fall into a dormant phase. Know what’s in your yard and tailor a care plan accordingly.

Let the Grass Go Dormant: A dry, brown, and dusty yard isn’t necessarily dead. Many varieties of grass are designed to “go to sleep” when weather conditions are especially hot or dry. This state of dormancy allows the grass to go up to two months without water. Yes, it won’t look nice, but you don’t need to tear up the lawn and start all over next year. As soon as temperatures drop and rainfall picks back up, your lawn will start return to its former glory.

Avoid fertilizing during the dormancy stage and high heat. Because your grass is taking a break until cooler temperatures prevail, it’s not likely to soak in the nutrients in the right proportions. And don’t aerate during long hot, dry spells, as this can create additional stress to the turf.

Once temperatures cool off, water your lawn deeply and infrequently to rehydrate the turf. Proper soil moisture will also promote healthy root growth. Proper rehydration will help bring your lawn back lush and green through the fall

Lawn Mower Mistakes to Avoid

Wednesday, July 13th, 2016

Exmark lawn care

When you make the investment in a quality mower, regular maintenance and upkeep is a must. Therefore, it is important to avoid situations that can damage your equipment, cause wear and tear, or even increase your chances of an injury. Take better care of your lawn—and your equipment—by staying away from these common lawn mower mistakes.


Buying More/Less Mower Than You Need: If your yard is smaller in size or covered with many things to mow around, chances are a larger zero-turn mower might not be the right machine for the job. At the same time, a yard that’s half an acre or more could take you hours to trim with a push mower. Always match the lawn mower you use to your specific needs. Considerations like the size of your lawn, the grade of any slopes, the type of terrain and obstacles, like trees, will all play a role.

Low Oil Levels: Just like a car, low oil levels can damage your lawn mower’s engine. To avoid overheating and keep everything lubricated properly, check your mower’s oil level each time you go out.

Low Tire Pressure: If you’re noticing an uneven deck, your problem might be as simple as low tire pressure on one or all of your tires. Low pressure can cause an uneven cut and affect your ability to steer or have proper traction, so always make sure the pressure matches mower guidelines before heading out.

Clogged Decks: The common mower advice to clean out your equipment after every use exists for a reason. Mowers work best and are safest when their blades and undercarriage are clean. After you mow, and once the mower is turned off, remove any dirt, grass, weeds, or other debris, and be sure to give the equipment plenty of time to dry before you put it away.

Dull Blades: Lawn mower blades aren’t meant to last forever. Over time and with excessive use, they will grow dull and less effective overall, which can cause tearing of the grass and make the turf more susceptible to disease. If you aren’t equipped to sharpen mower blades yourself, take them to your authorized dealer for sharpening or replacement.

Not Checking for Rocks and Other Debris: Even fairly small rocks and other debris in the yard can bend or chip your mower blades, leading to dull blades and uneven cutting. More importantly, not removing these items from the lawn before mowing can cause serious injury to others or property damage. Be careful with known rocky areas in your lawn, and trim around rocks that are too big to move before mowing.

Ignoring the Air Filter: When you’re performing regular lawn mower maintenance, make sure you check the air filter. To avoid clogs, wash the filter after each use and replace it once or twice a year.

Cutting a Wet Lawn: Clumps caused by wet clippings can clog the machine, and the water-soaked grass might be more slippery than you think. Even if you’re on a tight mowing schedule, it’s safer to wait until conditions improve.

Bad Storage: A lawn mower isn’t like a car, in that it’s not ideal to leave it parked outside and exposed to the elements. Covered storage is a must when the mower isn’t in use, even if it’s just for a few days at a time; however, you will want to make sure the mower is cooled down before putting it away. You should also consider storage where rodents and other pests can get in.

You should also keep up with mower maintenance schedules and follow the safety instructions for your mower. Most accidents occur because of shortcuts or a failure to properly secure the equipment before you use it. It might take a few extra minutes to get everything running in tip-top shape, but the quality of your lawn and your safety will be well worth it.