Archive for the ‘General’ Category

Mole Prevention and Eradication

Wednesday, May 31st, 2017

Few things are more destructive to a gently rolling landscape than the presence of moles. These voracious pests dig tunnels through the ground (often at speeds of up to a foot per minute) to seek out grubs, worms, ants, and the other insects that make up the bulk of their diet.

In the United States, they are often cited as one of the most common backyard pest problems—and one look at a yard overrun with these creatures, and you’ll see why. Moles are also a safety hazard, as tunnels collapsing underfoot can cause falls, sprains and even broken bones.

Impact of Moles on Lawns

The first sign of moles most people discover is a mound of soil on top of the ground. As the moles construct their tunnels, the dirt has to be dislodged somewhere, resulting in the creation of molehills.

Other indications include visible trenches, feeding burrows, and dead spots where they’ve caused substantial damage to the underlying root system. In other words, these critters are destroying your lawn from underground—and all the overseeding and aerating in the world won’t help. There’s little you can do to improve the look of your lawn until you get rid of the moles altogether.

Mole Prevention

As is the case with almost all pest control, prevention is your best approach. By making it difficult for the moles to survive in your yard in the first place, you can avoid many of the costs and hazards of getting rid of them later.

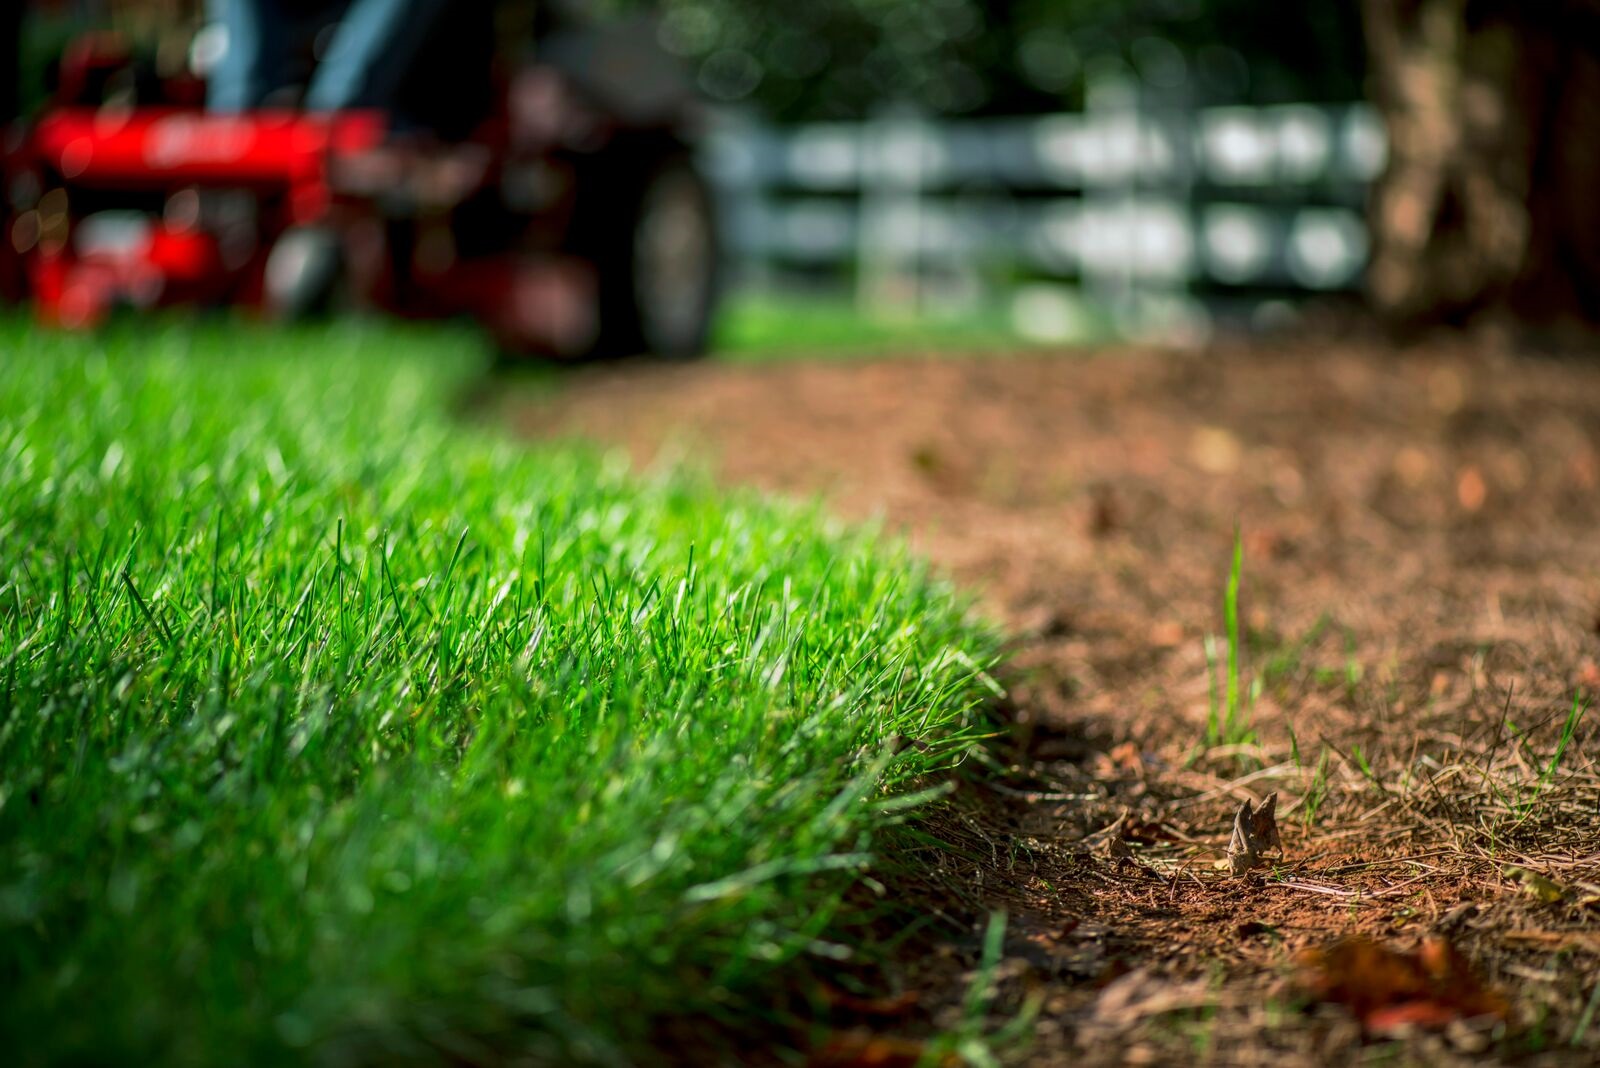
  • Grub Control: Moles love to snack on lawn grubs (which are destructive in their own right), so getting rid of the grubs can help. Insecticides can work, but so can taking good care of your lawn. Seeding and fertilizing in the fall, raising your mower blades to at least two inches, and not overwatering can all contribute to lawn conditions that look great and don’t encourage grub growth.
  • Pet Ownership: Although it’s not a good idea to get a pet solely for mole control, a dog or cat patrolling your yard can help warn moles away.
  • Garden Care: Moles love gardens because they’re an ideal habitat for another of their food sources, earthworms. However, moles dislike the scent of garlic, castor beans, and chocolate lilies. By planting these around your garden or yard, you can often stave off moles.

Other options include burying a mesh fence around the perimeter of your yard or garden. These have to go about two feet deep in order to be effective, but can be worth it, especially in a small lawn.

Mole Eradication

If you’ve already got moles, you’ll need to eliminate them entirely. How you approach this task will depend on where you live, as some states ban trapping, while others have strict regulations on which poisons you’re allowed to use.

  • Live Traps: Live traps are one of the most humane ways to eradicate moles, as you are able to relocate the moles somewhere else (as opposed to killing them). This requires you to determine which tunnels are active and lay the traps.
  • Kill Traps: Like live traps, these are laid at the ends of active tunnels. The moles enter them and are either killed immediately or trapped to be exterminated.
  • Poison: Poison bait is another option for homeowners who aren’t afraid of killing their uninvited visitors. There are several different choices on the market, but be careful of what you use if there are children or pets nearby.
  • Ultrasonic Spikes: Many moles dislike the sound of sonic pulses, which are only discernible to their ears. By burying these in your yard, you can often encourage moles to move on to areas where they aren’t plagued by unpleasant noises.

Sprays and Repellants: Mole sprays and repellants work to varying degrees. Some people swear by home remedies, while others rely on industrial chemical formulas used by professional exterminators. Anytime you do this, however, it’s important to check and see if the chemicals will have an impact on lawn growth, watering, and care.

If you’re uncertain or uncomfortable tackling this project on your own, be sure and contact a lawn specialist and/or exterminator. Getting your lawn back in order might take a few extra steps, but the end results will be well worth it!

Done in a Weekend: Landscaping That Speaks to You

Thursday, May 25th, 2017

Exmark’s Done-in-a-Weekend series highlights ways for you to enjoy a lush, green lawn with projects you can complete in 48 hours or less.

With spring underway, we’re all looking for those bright bursts of color that make a home feel more inviting. We’d like to introduce you to the idea of “layering up” your landscaping. Sure, your lawn looks great, and yes, you have the right mower and tools to keep it looking that way, but what about your outdoor living space? The bushes, plants and flowers you choose will define how your outdoor living will look this year.

Before you start any project to improve your landscaping, do some research. You can look online or ask at a garden store in your area. Learn what plants thrive in your specific climate, especially when it comes to your unique yard. Lots of shade means you’ll need different plant varieties than if your home gets full sun. Make a simple map of your yard, with sunny and shady spots marked, and bring it to the garden store; this will give the staff a better idea of the type of plants that will thrive in your yard.

From there, it’s all about texture and layers. It’s easy to build a landscape that looks great today, but for lasting comfort you and your family can enjoy year in and year out, it’s important to consider how the plants will mature. You want to pick the right size, the right shape, the right texture, and the right spacing for the plants once they reach maturity.

This video also includes helpful tips for the planting process. Whether this is your first time landscaping on your own, or if you’re looking for the motivation you need to get that weekend project off the ground, we highly encourage you to layer up. Your new outdoor living space awaits!

Heavy Spring Rains and Lawn Maintenance

Tuesday, May 23rd, 2017

Anyone who’s tried to tackle lawn care in a blustery, wet spring knows that nothing can create lawn and mowing problems like heavy rain. Standing water, mud, and long, damp grasses provide less-than-ideal conditions for pulling out the mower. But it’s necessary, because heavy rain can cause an equally heavy growth cycle—a growth cycle that desperately needs to be cut down.

There are ways to maintain your lawn even during heavy spring rains. Although you’ll need to take a little more care than usual, you can make the most of the new growth without sacrificing your lawn’s appearance.

Hazards of Heavy Rain

Anytime there’s standing water on a lawn, bringing out the mower might damage the lawn. This is especially true if there was flooding, in which case you’ll need to deal with silt deposits and other damage to the grass.

Wet grass tends to be heavier than usual and may even bend over. This can make a clean cut difficult even with the best equipment. At the same time, the clippings that result are likely to be just as damp as everything else. It can clump, get stuck in the mower blades, and cause unsightly deposits all over the lawn. This may mean you’ll need to rake the clumps and clean out your equipment in addition to your regular mow cycle.

Excessive moisture can also soften the underlying dirt, which will sink when you—and your mower—pass over it. This can cause ruts and mud tracks, which often have to later be reseeded.

How to Cope with Heavy Rain

Lawn maintenance

Keep your lawn looking its best with proper lawn maintenance.

Fortunately, there are steps you can take to improve the appearance of your lawn and even make the most of the rain cycle.

  • Wait for the Grass to Dry: Ideally, you should wait until the lawn has dried out before you mow. This doesn’t mean it has to be bone dry and all moisture gone—it simply means that if you can see water on the lawn or on the blades, you may want to wait until it’s absorbed before you mow.
  • Use the Highest Setting: Regardless of how wet the grass is, set the blades to the highest setting. This will help you avoid clogging and keep your machine in good repair. This may mean that you’ll have to mow a few more times a week than you’re used to, but your lawn—and your lawn mower—will thank you for it.
  • Fewer Passes are Better: A lawn that has been waterlogged or is showing signs of flooding is a lawn you want to walk on as little as possible. Too much foot traffic could tamp the blades down and draw the mud up—two things that are likely to make the lawn worse rather than better. Limit the amount of foot traffic and use a zero-turn mower that allows you to get the job done more efficiently.
  • Plan on Aerating: For excessive moisture, aerating the lawn might be a good way to open up the soil and speed the drying process. This has the added benefit of helping foster healthy growth in the lawn for the season to come, which is something many homeowners and landscape professionals plan on doing in the spring anyway.

You don’t have to stop your planned spring mowing due to heavy rain, but you should take extra precautions before you head out. Avoid mowing over mud and silt, take care to let the grass dry as much as possible first, and plan on being more diligent until the weather clears. Your lawn—and your clients—will thank you for it.

Noticing Crabgrass? Here’s What To Do About It

Monday, May 15th, 2017

Most people don’t notice crabgrass taking over their lawns until summer. This voracious, fast-spreading weed is at its most productive during the warm summer months, growing all throughout lawns and stealing nutrients from the grass that really needs it. By the time you notice it in abundance, chances are it has taken firm hold of your lawn and you’ll need to take an intensive approach to get rid of it.

That’s why you should start looking out for crabgrass earlier. Most of the time, you’ll see a few patches taking root as soon as the temperatures start picking up for the year. The seeds lie dormant all winter, but as soon as the ground temperature is warm enough to support them, they start awakening in earnest.

Keep your lawn looking its best with proper, planning and upkeep.

Preventing Crabgrass

If you get at crabgrass before it starts to germinate, you’ll break the cycle of growth. This means you’ll need to be vigilant as soon as the growing season begins in spring.

And the best way to be vigilant? To have a healthy lawn.

A yard that is vibrant, thriving, and well-cared for creates a difficult place for crabgrass to take hold in the first place. This includes regular (deep) watering, cutting no more than one-third of the grass leaf at a time, and regular aeration/dethatching and other turf care. A nicely tended lawn also makes it easier for you to notice trouble areas as they arise.

Controlling Crabgrass

 If you already have a crabgrass problem, it’s not too late. Depending on how far the season has progressed and how much of an infestation you have, you may want to consider the following options.

  • Pre-Emergent Herbicide: This herbicide is designed to kill crabgrass seedlings in their early stages of growth. Ideally, it should be applied as soon as the ground temperature reaches 60 degrees—which, for most regions, is fairly early in the spring (as soon as your local trees start budding). Because this herbicide can be rough on newly growing grass, it’s best not to apply this universally over a lawn that has been recently seeded.
  • Regular Herbicides: Crabgrass is pretty good at standing up to regular weed killers, including weed & feed fertilizers and anything designed to kill broadleaf weeds. And any other kind of weed killer that is strong enough to kill crabgrass is probably going to be good at killing your regular grass, too. That’s why many homeowners spot-kill crabgrass using a product that allows you to direct where you spray.
  • Crabgrass Killers: There are specialty herbicides designed to kill crabgrass. They should be used according to the exact directions on the label. In almost all cases, you want to spray this when temperatures are cooler (lower than 85 degrees) and at a time when you can stay away from mowing, watering, and walking on your property for a few days afterward. Early summer and early mornings are best.
  • Non-Chemical Options: If you’d rather avoid chemicals altogether, you can opt to pour boiling water directly on the crabgrass plants or pull them by hand (making sure you get the full root). This is time consuming—and labor intensive—and you’ll need to reseed the area afterward, but you’ll avoid using herbicides this way.

Prevention is the best cure, so come up with a plan of action to keep your lawn lush, green and healthy. By staying on top of lawn care tasks like seeding and aerating, it is possible to stop crabgrass from getting a foothold.

Dandelion and Other Spring Weed Prevention

Tuesday, March 7th, 2017

Most spring weed prevention tips will tell you to invest in a powerful weed killer and to remove any dandelions before they go to seed—and this is sound advice.

However, in order to make the kind of change that will last, it’s important to start good, healthy lawn habits that will carry you through every season.

How to Prevent Dandelion Growth

The best thing you can do to prevent the growth of dandelions is to have a thick, green lawn. We know—it sounds oversimplified, and in many ways, it is. However, what dandelions and other weeds love most is neglect. They just love those bare patches you’ve been meaning to fill and hard-packed soil that’s difficult for grass seeds.

That’s why, by creating a lush and healthy lawn in the first place, you can prevent many kinds of weeds from taking root in the first place.

Exmark Spreader-Sprayer

Spring Weed Prevention is made easier with the Exmark Stand-On Spreader-Sprayer. This versatile, easy-to-operate, easy-to-maneuver machine offers our most advanced lean-to-steer technology and outstanding stability— even on hillsides.

Early Spring Dandelion Care

Your early spring dandelion care (done before those weeds even make an appearance) should include aerating, dethatching, and overseeding your lawn. Grass tends to require a better balance of nutrients and oxygen than weeds, which are hardy and will sprout anywhere they can. Starting spring with a well-aerated and dethatched lawn will ensure that the soil isn’t too compact to foster healthy grass growth, but will also allow you to seed and fertilize, as needed.

Overseeding is also a good idea at this time—especially if you have bare patches, thin grass, or weren’t able to seed in the fall. Most experts recommend you wait until the temperatures are consistently in the 50s before you begin, which, for most of us, means early spring. A lean-to-steer spreader sprayer allows you to cover a large area of time in just minutes, covering the necessary ground with the grass seeds and fertilizer needed to foster natural, healthy growth. (You can also combine dethatching and seeding with a specialty slicer seeder that performs both tasks at once.)

Late Spring Dandelion Care

Once your lawn has been given a chance to flourish, you can start introducing fertilizers, weed sprays, and other chemical treatments. Most new grass growth should be treated like a delicate plant, so wait until the grass has time to go through its peak growing season before you treat it.

Slow-release fertilizers tend to be less damaging on new growth, as are weed killers that can be applied directly to the weeds (as opposed to spread out over the lawn). General sprays or applications applied to the entire lawn tend to be better reserved for the fall, when the grass can tolerate it better. You also have the option of manually removing weeds as they appear, which can be done by hand or with a weed digger.

You can also combat weed growth in the spring by adjusting the height of your mower blade so that the grass remains between 2 and 3 inches high. Taller grass may need to be mowed more often, but the higher leaves shade weeds out and ensure that the grass has all the chlorophyll and moisture it needs to stay healthy and continue growing throughout the year.

Continued Upkeep and Maintenance

Nothing will help your lawn remain weed-free forever. That’s why you’ll need to stay on top of your lawn care regimen and keep an eye out for those pesky dandelions. As soon as you start to spot them cropping up for another year, it’s time to look at what you can do to improve your lawn’s condition.

Clipping Control: Baggers, Ultra Vacs, and More

Wednesday, March 1st, 2017

The right grass collection system leaves behind a smooth, clean lawn that will make your mowing service the envy of the neighborhood. Mowing during heavy growth seasons or when there are large accumulations of organic debris in the fall may require different equipment for handling clippings, especially if you have commercial clients who want a well-manicured look. Exmark has multiple options for clipping control.

UltraVac Systems

UltraVac 3-Bag Collection System

The UltraVac system has what you need to create that perfect finish.

If you have an Exmark zero-turn mower, the UltraVac collection system is an extension option that can be added to your equipment.

At the basic level, you can opt for non-powered collection bags with reinforced bottoms and plenty of capacity to cover large areas without stopping to empty. The UltraVac’s large tubes help minimize clogging, which means less maintenance and fewer delays. And because there’s no complicated machinery involved, you can install the UltraVac in minutes.

For more power and commercial-grade results, you can choose the UltraVac QDS collection system, with a large collection hopper made of steel and polyethylene. This hopper can be emptied by a lever from your seat, allowing you extra versatility without slowing you down. And because the hood is sealed, no excess dust gets dispersed while you work.

For more information on which systems are available for your mower, you can visit Exmark’s accessories page. Enter your mower information, and we’ll tell you what kind of collection system is compatible with your equipment.

Exmark baggers

Exmark’s various baggers make clipping control easy with a variety of baggers that are easy to install.

Baggers

Depending on your mower, Exmark has a selection of baggers and grass catchers. These come in various capacities, allowing you to work more efficiently. Because these options are designed to be used with our mowers, they’re easy to install and made of the quality materials Exmark is known for.

Enhanced Clipping Control

In slower growth periods, you may not need a bagger, but you still want to leave your customers’ lawns looking neat and clean. Rear discharge cutting decks, which allow you to precisely control the amount of clippings and where they end up, and micro-mulching systems, are ideal. They can save you time, as you no longer have to haul and handle clippings. (NB: Link to micro mulch blog post)

Whatever your lawn care business’ needs, Exmark can help you keep the clippings under control.

When to Start Mowing in the Spring

Monday, February 27th, 2017
When to start mowing

It’s best to step back and take a look at lawn conditions before you start mowing this spring.

You might be tempted to pull out the mower and start cutting down that new spring growth as soon as it appears, but it’s best to step back and take a look at lawn conditions before you begin. The burst of healthy grass activity in spring will help keep your lawn lush and vibrant for the rest of the year. By timing your mowing and seeding schedule to make the most of this growth, you’ll enjoy much better results overall.

Ask yourself the following questions to know if the timing is right.

How tall is the grass? Give your spring grass a chance to develop strong, healthy roots by waiting until it’s at least 2 inches tall before mowing. Even then, stick to the rule of not taking off more than a third of its length so that it doesn’t die before it’s had a chance to develop.

How recently did you fertilize? Spring is a great time to fertilize your lawn because of its high rate of new growth. Like a child going through a growth spurt, the grass consumes nutrients at a much faster rate than normal. Both early and late spring are ideal times to fertilize—but remember that you have to give the nutrients a chance to be absorbed before you mow, so time accordingly.

Are you overseeding this year? Overseeding is another common activity in spring, especially if you invested in a slicer seeder this year and want to see where your new equipment will take you. This is typically done before fertilizing, so you’ll need to set up a schedule of seeding, mowing, and fertilizing that won’t cause further damage. In most cases, you’ll have to plan on not mowing until later in spring (April-May).

Where do you live? Location will have an impact on your mowing schedule, especially if you live where late frosts are a possibility, or there’s an excess of rain.

Freezing conditions: The freezing/thawing cycle can be very rough on new growth, and can cause dehydration, which isn’t good for the grass. Cutting it down while it’s unstable can cause irreparable damage. If freezing is a possibility, you should plan on mowing the grass when it’s longer than usual. It’s better to risk longer grass and the need to mow more often than to cut it too short and have the frost kill the rest of the plant off.

Wet conditions: An unseasonably wet spring could cause a huge rush of damp growth that can be more difficult to mow. Therefore, pay close attention to the weather conditions. You may need to scale back on your mowing schedule until the grass dries out to prevent potential problems or damage to the turf.

How much time do you have? As soon as you perform that first mow, you should plan on mowing every 3-5 days to create a clean, manicured look. By waiting until you have the time and energy to devote to mowing, you’ll end up with a better looking lawn.

Lawn Recovery: How to Get a Lush Lawn if You Were Affected by Drought in 2016

Thursday, January 26th, 2017

With average summer temperatures rising and drought prevalent in many areas of the United States, it’s becoming much more common for homeowners to face dead, dry lawns. Few things look worse than a huge patch of brown grass and weeds, especially since it’s not always possible for your lawn to recover right away.

Fortunately, there are steps you can take to grow a full, lush lawn in the spring – even if it looks as though your grass has completely died.

Is the Grass Dormant or Dead?

The first thing you should do following a drought is determine whether the grass is fully dead (and therefore unrecoverable) or merely dormant. Most of the time, it’s the latter.  Grass is very durable and will put itself in a period of dormancy whenever conditions aren’t ideal. Yes, it looks unhealthy, brown, and dry, but water and care will bring it back to life again.

There are two ways to determine the state of your lawn: you can get down to the roots to make an examination, or you can water a patch of the lawn to see how it reacts. A dormant lawn will still have green and off-white growth at the roots; a dead lawn will be brown and brittle all the way through. If you can see some life at the base of the blades, you can expect a full recovery. Grass that’s merely dormant will react to the water by growing green after a few days of diligent care.

If your lawn is dead, there’s nothing you can do to save it. Your only options are to remove the dead patches and either re-seed or sod it. If it’s dormant, the next steps will take you through the recovery process.

Drought Lawn Care

Although your instinct might be to water your lawn to bring it back to its former glory, it’s not always ideal (or possible) to water right now. It takes quite a bit of irrigation to get a lawn to recover, so if there are watering restrictions in your area, expected restrictions in the future, or other weather conditions to contend with, it might be best to let your lawn remain dormant for the time being. This way, you can prep the area and get it ready for spring, when you can water in abundance without fear of interruption. These are the general steps:

  1. De-thatch the Lawn: Dead organic matter will eventually break down on its own, but if you have too much of it, you’ll cover the roots of the grass and prohibit water and oxygen from getting where it needs to go. Use a de-thatching tool on your existing mower or invest in a rotary broom to clear away this dead matter.

    Exmark Aerators

    Exmark aerators are a combination of legendary strength, ease, and innovation.

  1. Aerate the Lawn: An aerator will help deliver moisture to the root system in the lawn, which is very important during the recovery stages. Most people plan to do this annually in the fall, so plan on either performing the task then or pushing it up a few weeks in late summer.
  1. Stop Foot Traffic: Yes, a dormant lawn can fully recover, but only if you treat it with more care than you normally would. It’s fine to walk over the lawn to de-thatch, aerate, and (later) re-seed, but avoid any non-lawn-care-related foot traffic, including kids and dogs.
  1. Overseed the Lawn: Since you’ll want to wait until conditions improve to fully restore the lawn, you should also plan on overseeding at this time. You’ll be providing lots of water, care, and fertilizer anyway, so you might as well take care of patchy areas that existed before, too. (This is a good time to choose a new grass type, as well. Some grasses, like St. Augustine or Bermuda, are very drought resistant. Others, like Fescue, don’t do well in the heat. Match your grass to your area to avoid dormancy in the future.)
  1. Water, Water, Water: As soon as you reach a time where you can water for several weeks without interruption, it’s time to bring the lawn back. Plan on watering deeply and fully at least twice a week, usually in the early morning, as this will allow the moisture to seep into the soil and get to work before the heat and sun of the day cause it to evaporate.
  1. Set Your Mower Height: You’ll still need to perform regular lawn maintenance, but it’s important to allow the grass time to recover. For this reason, sharpen the blades (to avoid damaging the grass as it’s cut) and set the height so that no more than 1/3 of the grass blade is removed at any time. You should also allow the mulch to remain on the lawn, as the added moisture will help foster healthy growth.
  1. Fertilize the Lawn: Although you might be tempted to fertilize right away, your grass needs water more than nutrients at this time. Plan on fertilizing once the growth takes hold and some of the green is recovered.

From there, you can most likely return to your regular lawn care schedule. It may take a few weeks before you start to see results, but careful watering and maintenance will ensure that your lawn comes back even better than before.

How to Design a Beautiful, Yet Mower-Friendly Yard

Tuesday, November 15th, 2016

One of the good things about fall is we get to start planning our lawns and landscapes for next year. Some of us may be thinking about ways to enhance a plain lawn, while others are looking for a way to make it easier to mow around beds, features and plantings. These design tips will make it easier to mow, while giving your yard a more finished, landscaped look.

Keep your lawn looking its best with proper, planning and upkeep.

Well defined borders between your lawn and plantings are a must if you want to mow with ease.

  • Create Borders: Good, clean borders between your lawn and your ornamental plantings are a must when you want to be able to mow with ease. This will allow you to maintain a clear separation between the areas you can drive over with your mower and the areas that will require closer weed care.
  • Create a Center: Use beds full of shrubs and perennials around the outside of the space to frame it. For a formal look, use straight lines. For a less formal look, use gently curving beds (gentle curves are easier to mow than tight curves). This will draw the eye to your plantings, while framing the area and creating contrast to a flat sweep of lush, green lawn.
  • Potted Plants: There’s no reason why your plants and exotic blooms have to be put in the ground in order to add appeal. Large potted plants placed on patios or in out-of-the-way spaces are easy to maintain and add visual appeal. This can work especially well for figs, citrus and other less hardy fruit trees that need to winter indoors.
  • Use Vertical Space: When you design your yard, think about going up instead of going horizontal. By putting in retaining walls, raising your garden beds, and planting creeping plants against a trellis or other feature, you can create a separate space for ornamental plants. This leaves your grass free, open and easy to mow.
  • Plant in groups: To make mowing easier, try grouping plants together. By placing them in close proximity to one another and filling the spaces between them with mulch, rocks, or stepping stones, you can avoid mowing around individual plants. This will help you save time while still allowing you to plant as many visually appealing blooms and shrubs as you wish.
  • Don’t Forget Sprinkler Heads: Sprinkler heads that protrude from the grass are a lawn mower’s worst enemy. If you’re in the design stages of your lawn, try to find ways to set the sprinkler heads away from the areas you want to mow or choose the kind that retract and lie flat after use. This will make it easier for you to pass over your lawn with your mower.

Start planning now to make your yard more beautiful but easier to mow next year.

Hot Weather Lawn and Grass Care

Tuesday, July 26th, 2016

EX16_Pioneer_S-Series_InUse_6_web72With temperatures soaring well above 100 degrees and drought advisories in effect across the country, summertime lawn care can be a challenging task. However, maintaining a healthy lawn is not impossible—especially if you have the right tools for the job and know how to manage turf in the heat of summer.

From changing your mowing times to adjusting your mower to meet your lawn’s demands, here are a few tips for taking care of cool-weather grasses in seasonally high temperatures.

Set Your Mower Blades Higher: Longer grass tends to hold moisture better than short grass, especially in areas of high sun exposure. Instead of setting your lawn mower blades to remove the top 1/3 of the blade, raise it even higher. Although you’ll have to mow more often to keep your yard looking neat and trim, the higher cut will help the grass be less susceptible to stress.

Change Your Mowing Time: In order to minimize the stress on your lawn, plan to mow either early in the morning or late in the evening (provided your neighbors won’t mind). You might also want to mow after a rainfall or good day of watering. This way, you can avoid inadvertently causing stress to the grass from the combination of shorter grass and midday heat. You should also make sure your blades are sharp and working well. Dull mower blades can add an unnecessary strain on the grass, as they can cause tearing.

Mulch Grass Clippings: Instead of bagging or blowing the grass after you mow, mulch the clippings back into the lawn to become part of the life cycle. These nutrient-rich clippings provide moisture and other necessary nutrients to help keep your lawn healthy.

Avoid Foot Traffic: Keep your kids and pets off of any grass that’s struggling under stress. The less traffic you allow on your lawn, the better it will look overall.

Research Grass Varieties: Cool-season grasses include varieties like fescue, bluegrass, and rye. Warm-season grasses include zoysia, St. Augustine, centipede, and Bermuda. Cool-season grasses tend to fade a lot faster once temperatures move up over 60 degrees, and are much more likely to fall into a dormant phase. Know what’s in your yard and tailor a care plan accordingly.

Let the Grass Go Dormant: A dry, brown, and dusty yard isn’t necessarily dead. Many varieties of grass are designed to “go to sleep” when weather conditions are especially hot or dry. This state of dormancy allows the grass to go up to two months without water. Yes, it won’t look nice, but you don’t need to tear up the lawn and start all over next year. As soon as temperatures drop and rainfall picks back up, your lawn will start return to its former glory.

Avoid fertilizing during the dormancy stage and high heat. Because your grass is taking a break until cooler temperatures prevail, it’s not likely to soak in the nutrients in the right proportions. And don’t aerate during long hot, dry spells, as this can create additional stress to the turf.

Once temperatures cool off, water your lawn deeply and infrequently to rehydrate the turf. Proper soil moisture will also promote healthy root growth. Proper rehydration will help bring your lawn back lush and green through the fall