Archive for the ‘Maintenance Tips’ Category

Fuel Safety Tips

Tuesday, August 5th, 2014

Fuel safety is critical to the safe operation of any mower, and understanding how and when to inspect fuel system components doesn’t just increase safety, it also increases mower efficiency and longevity.
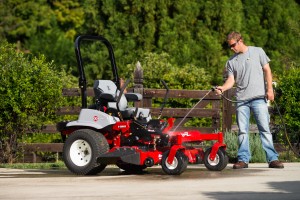
Keeping the mower clean from accumulated debris makes it easier to spot fuel system problems and reduces the risk of fire.

Keeping your mower clean from accumulated debris makes it easier to spot fuel system problems and reduces the risk of fire.

Tips that can increase the safety of you and your workers when working with fuel include:

  • Prior to fueling, always shut the mower down completely and allow it to cool.
  • When refueling, verify the correct type of fuel is being used — Filling the tank of a diesel-powered mower with gasoline (or vice versa) can cause significant engine damage, so double-check your fuel before you fill.
  • DO NOT operate the mower if any of the following fuel system conditions exist:
    • Fuel is leaking around hoses and/or clamps.
    • The fuel tank makes a hissing sound when the cap is loosened.
    • The fuel tank is bulging or collapsing.
  • Keep the mower clean and free of debris — Accumulation of grass, leaves, excessive grease or oil, or other debris can become combustible and could result in fire. After each mower use, remove debris from:
    • Fuel tank
    • Engine and muffler area
    • Oil filter area
    • Under belt shields
  • Frequently check all fuel hoses, clamps and connections — Some fuel system components are under pressure. Fuel hoses can be pulled, damaged or disconnected from contact with bushes, tree branches or other landscape features.
    • Check that all hoses are in good working condition and verify the secure fastening of clamps and connection points.
    • When replacing hoses and filters, use original factory routing and clamping.
  • Use only Original Equipment Manufacturer’s (OEM) replacement parts — Using improper components can result in gasoline leakage, fuel system failure and/or an increased potential for fire. Saving a buck just isn’t worth the risk!
  • Keep all guards, shields and safety devices in place and in safe working condition.
  • Before each use, check the condition of all electrical wires — Damaged wires increase the potential for a fire. Never operate a mower with damaged wiring. Replace or repair the damaged wire(s) and secure properly prior to mower operation.

Consult your operators manual for specific fuel system information for your mower. Visit http://www.exmark.com/Safety/ to view the online safety resources Exmark offers, or visit your Authorized Exmark dealer or distributor for prompt, efficient service with any fuel- or fuel system-related need.

Maintaining Your Cutting Edge

Thursday, September 12th, 2013

A little maintenance goes a long way when it comes to keeping your Exmark cutting system performing at its best. In the heat of the cutting season, while you’re focused on cutting grass, it’s easy to let blade and deck maintenance intervals slip. It’s a common challenge, but when it comes to cut quality and cutting efficiency, it pays to keep blades sharp and belts tight.

Blade maintenance

The sharpness and overall condition of your cutting blades are extremely important to the performance of your Exmark mower. Here’s why: instead of cutting cleanly, dull blades tear blades of grass instead of cutting them cleanly, increasing susceptibility to dieback and pests. And due to their inability to efficiently cut grass, dull blades also increase the load on the engine and powertrain of a mower. This decreases fuel economy and increases component wear, leading to increased service costs and ultimately, a reduced lifespan for the mower.

For landscape contractors, the lost efficiency and increased wear and tear can significantly impact profitability. As a result, it pays to inspect the blades and deck each day, and sharpen/balance blades every 10- to 50-hours, depending on cutting conditions. Be sure to replace any blades that show excessive wear, especially where flat and curved parts of the blade meet. If significant wear or slotting is observed (see Figure 1), replace the affected blades with appropriate Exmark Original Equipment (OE) before mowing again. Exmark OE blades are engineered for specific cutting conditions and their use preserves the performance and long-term durability of the Exmark cutting system.

Figure 1: Replace worn blades if you observe signs of wear or slotting.

Since cutting conditions vary, it’s tough to predict exactly when blades will need sharpening, so many contractors will keep an extra set of sharp, balanced blades in the truck, ready to be rotated-in at a moment’s notice. That way they can continue cutting uninterrupted and can wait until they get back to the shop to sharpen and balance the blades.

Belt and idler pulley maintenance

Belt tension is an issue that Exmark users really don’t need to worry about, since the belts are self-tensioning. Because of this, service is reduced to checking the condition of belts every 50-hours and replacing as necessary.

Because belts stretch most when they’re first installed, it pays to stay on-top of belt tension adjustment on mowers that lack an automatic tensioner. Running a mower with loose belts significantly decreases the lifespan of the belts, so check their tension three times in the first 24 hours of use following installation, adjusting as necessary. After this break-in period, check belts every 50 hour of use, adjusting when tension drops below the specification in the owner’s manual.

It’s easy to check belt tension with a ruler and a fish scale. Simply hook the fish scale around the belt and pull, using the ruler to measure the belt’s deflection. Some Exmark belts are specified to run at ½-inch of deflection under 10-pounds of pressure. At this tension, a 10-pound load on the belt will move it ½-inch.

Idler pulleys should be clean and free of debris. An easy way to extend the life of idler pulley seals is to spray them periodically with spray lubricant. Exposure of the seals to the sunlight’s UV rays can harden the seals, reducing their effectiveness. A quick squirt of spray lube periodically keeps the seals soft and supple and helps them do a better job of keeping dirt out.

Of course, keeping the cutting deck clean and free of debris is extremely important to the overall efficiency of an Exmark mower. Each day, as you check the condition of cutting blades, be sure to also check the mulch build up under the deck, cleaning as necessary.

Visit Exmark.com for more information, tips, product manuals, maintenance schedules and more.

Battery TLC during mowing season

Wednesday, April 6th, 2011

Sometimes batteries get ignored during mowing season until the day your mower refuses to start.

Here are a few things you can do to show your battery a little love and help keep it going throughout the season:

  • Check your battery’s fluids at least once a month. If you live in an area where summers are scorchers, check fluids weekly. If they’re low, only use distilled water.
  • If your battery can’t seem to hold a charge, try removing it from the machine and putting it on a trickle charger for a couple of days. It can refresh the battery.
  • Make sure your electrical system isn’t overcharging the battery. If your mower’s fuses are blowing and there’s no good explanation for it, it’s a sign your electrical system needs to be checked. Your Exmark dealer can run a fairly quick test to see if the system is working properly

This post by David Martin, customer service manager at Exmark.

Mower TLC

Thursday, February 3rd, 2011

For those of you that haven’t had a chance to check out some of our older posts about maintenance for your Exmark, here’s a refresher. Sure, your Exmark mowers are tough machines, but even the metal beasts need to be shown a certain amount of care to keep giving the results you and your customers are looking for. Here are a few ways to help your equipment get the job done right.

  • Change the gas and oil soon after taking out your mower. Gas that has been sitting in the tank throughout the winter becomes lower in quality and has a tendency to go stale faster, causing damage to your mower.
  • Check the blades before any big job. Seriously. Do it. With a little practice, you can change a set of blades and be mowing in less than five minutes, and the higher quality cut is sure to impress.
  • Give your mower a good cleaning inside and out since grass clippings can often hide out of plain sight. It may require a little more work, but in the end better airflow through the deck will deliver more of the cut quality you’ve come to expect.
  • It’s not exactly manly, but reading the manual is essential for proper care of your equipment. Even if you’re a mower maintenance guru, the difference from one model to the next can be staggering.
  • If something does go wrong, call up an expert. A few well spoken words of wisdom can save a do-it-yourselfer from hours of headache.

See? It doesn’t take that much to keep your mower happy, which, in the end, will keep you happy.

We’d love to hear how you keep your mower in tip-top shape.

Leaf removal – the sequel.

Tuesday, November 23rd, 2010

So we asked, and we received. In our last leaf removal post, we asked you to share some of your favorite tips and techniques with us on leaf removal. We’re glad to say we got quite a few responses – some creative, some pretty funny and others that we could see coming in quite handy. Thanks to all who shared!

And, rather than just picking one – we decided to go with a few of our favorites:

Mitch

I own an Exmark Turf Tracer HP. Usually I blow all the leaves out of the flower beds onto the lawn with my blower. Then I mow the lawn two to three times to mulch up the leaves. The mower is designed so well, it acts like a very powerful vacuum, sucking up the leaves and shredding them into tiny pieces! It doesn’t miss any leaves and I’m just using the normal Exmark blades. After I mow over the leaves two to three times, I attach my bagger and mow once, emptying my bagger every once in awhile. This works great for me.

Ryan McCallum

I own a Navigator. After blowing the leaves out of the gardens and tight areas I run over them with the machine equipped with the mulch plug to chop them up really fine. Then I take the plug out and bag as usual. Takes a bit more time but saves a lot of space on the trailer.

Rob Robinson

Blow out all the plant beds into the lawn and suck the leaves up from there. If there are a lot of them, it’s not a bad idea to grind the leaves up a bit to cut down on the amount you have to move.

Brennan Wright

Mulch kit probably the best investment I’ve ever made.

Ryan Nicola

The JRCO leaf plow works great moves lots of leaves quick leaving a thin trail behind which can easily be vaced up with a mower or blown easily with a good back pack blower.

Daniel Lane

For individual small yards, grab the biggest, thickest tarp you can, rake and blow the leaves onto it, and move by hand or tie off to your rider for the burn pile or truck.

Bonnie Lange Salonek

Ultra Vac – just got mine and I love it!

Kenny Farrell

Mulch over them with a Lazer and bag them up with a Turf Tracer.

Though we don’t encourage this behavior, the following posts made us chuckle a bit:

Joe Caron

Hire someone to do it for me!

Brian Smith

Cut down all the trees.

Justin Monnig

I’ve got all sorts of ideas, let’s see, how about use a speed blower or buffalo blower to move ‘em into your neighbor’s yard. No bagging needed. Then sit back in a lawn chair with an alcoholic beverage as your neighbor sweeps them up.

If you have more ideas you’d like to share, feel free to leave a comment below.

Helping your battery survive the winter months

Tuesday, November 16th, 2010

Your mowers’ batteries are no match for winter’s cruel, frigid temperament. Extreme cold can sap the life out of your battery, leaving you with nothing more than a new, heavy doorstop. Here are a few simple steps you can take to protect your battery from the bitter cold:

  • Always remove the battery from the machine and store it in a climate controlled area that stays between 50 and 70 degrees.
  • Put your battery on a trickle charger throughout winter. Or about a month before mowing season starts, put it on a trickle charger for at least a week, to recondition the battery and get it ready for mowing season. A trickle charger will give your battery a slow, deep charge that will help rejuvenate it after a period of dormancy.
  • Open up your battery’s ports and check to see if the fluids are low. If they are, fill them up with distilled water. Never use tap water to fill your battery.

This blog post is by David Martin, customer service manager at Exmark.

Fall maintenance, Part 2

Friday, October 22nd, 2010

In this second part of our maintenance segment, we continue to provide tips to help you get your mower in tiptop shape for its hibernation period. If you missed part one of this segment, go here.

Closer inspection

This is a good time to check your machine’s belts and replace any that are frayed, cut or damaged. Check the mower’s pulleys, making sure they’re not bent, misaligned or jammed with debris. Landscape bark has a tendency to get wedged deep into the pulleys, so give them a close inspection.

Storage

Whether you’re storing your machine in a shed, under a tarp or in an enclosed trailer you want to do whatever you can to keep rodents away. Aside from thoroughly cleaning your mower, you can take other precautions to deter little critters from turning your machine into their winter home. You have your pick of traps and chemicals as well as natural means, such as Osage oranges and oil of peppermint to keep mice at bay. Peppermint candy will NOT do the trick, but invite more critters as well as insects to the party. Don’t use any harsh chemicals around your machine as they will cause damage. If you live in a rural area, you might want to consult with your local pest control office. They’re likely to give you good suggestions. Your local Exmark dealer will also be able to provide ways to keep your mower rodent-free.

Moisture is the other thing you want to keep as far away from your mower as possible. Wherever your mower is stored, make sure rain, ice and snow aren’t getting in.

We also recommend draining the fuel from your machine, or adding a fuel stabilizer. Don’t let fuel sit in your mower through the winter months.

Battery

To extend the life of your battery, best thing to do is remove it from your machine and keep it in a climate controlled area that’s between 50 and 70 degrees. For other tips on battery maintenance, check out this post.

Following these steps will ensure a safe winter season for your machines. Come spring, they’ll be ready to go back to work.

This blog post is by David Martin, customer service manager at Exmark.

Fall maintenance, Part 1

Tuesday, October 19th, 2010

There’s nothing more important for extending the life of your mower than proper maintenance, whether it’s pre-season maintenance, in-season maintenance or fall/winter maintenance. Since summer is officially over (already?), we thought this would be the perfect time to focus on fall maintenance. You want your mower to be ready for the long, cold days ahead. Since the list is long, we’ll break up maintenance into two posts, so make sure you come back for the sequel.

A good cleaning.

Storing a clean mower is key. Your mower’ worked hard all summer long and deserves a good wash down. Which brings us to our first cleaning tip: never wash your mower with water or solvents. Water on steel results in rust and deterioration. Clean your mower with air. A leaf blower is a great way to clean a mower, or you can use compressed air.

Make sure you clean everywhere – lift up the seat, get under the deck, reach behind the tires, remove belt guards and clean the area underneath, really get into every nook and cranny. Any debris left on the mower can do one of two things: become a rodent nest or trap moisture. If you’ve already forgotten the first tip we gave you, here’s a recap: steel + water = rust.

Grease is good.

Your mower has bearings that need to be greased. This is the time to do it. Make sure you’re not only starting with fresh grease, but also using the right kind of grease for your machine and conditions. Your Exmark dealer will be able to help you in picking out the appropriate grease.

The greasing technique for the bearings is extremely important. In other words, don’t hurry through it or use shortcuts. Make sure you remove the load before you grease the bearings. If you try to grease bearings while they’re still under load, you’ll end up greasing only half the bearing. It’s worth your while to take your time and remove any belts and springs before employing the grease gun. If the bearing is moveable, we recommend that you move it three or four times to get a nice coating on the bearing. This is also a good way to inspect the bearings for wear and tear, making sure they move freely without any grinding or tightness.

Oil change

Like your car, your mower needs its engine oil and filter changed. It also needs its hydraulic fluid and filter changed. Once all of the fluids and filters have been changed, start the machine for about five minutes or less to make sure the clean engine oil circulates throughout the machine. Utilize the hydraulics to get the fresh fluid circulating as well. If changing your mower’s fluids isn’t your strong suit, take your mower to your dealer. Most dealers run a winterization special during this time of year. One of the benefits of having your dealer perform end of season maintenance is that they usually have a multipoint inspection of the machine that examines multiple wear points, catching something you may miss or not even think about checking. If they do find something, winter is probably the ideal time to have your mower serviced, since you won’t need it in the field.

That’s it our first segment of fall maintenance. Check back soon to see more tips on what you need to do to maintain your mower.

This blog post is by David Martin, customer service manager at Exmark.

Once again, let’s talk lubrication.

Thursday, September 23rd, 2010

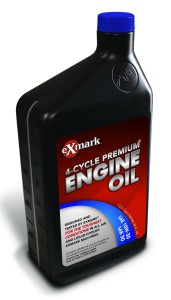
EngineOil_FrontIt’s true we have multiple posts discussing lubrication. (Three to be exact, but who’s counting?) But as you’re wondering why we’re getting stuck on this one topic, just remember that proper lubrication extends the life of your mower.  And, we want you to help keep those bad boys working hard for you for as long as possible.

So here’s the breakdown on what you need to know and what you should be doing:

  • Change the engine oil after the first five hours of operating a new mower.
  • Your first hydraulic oil and filter change should be at 200 hours.
  • After initial hydraulic oil and filter change, and if you’re using genuine Exmark Hydraulic Oil, change the oil and filter at maximum every 500 hours.
  • If you’re using Mobil 1 Oil, change the oil and filter at maximum every 250 hours.
  • If you are mowing hills or running bagging equipment, change hydraulic fluid and engine oil much more frequently than manufacturer’s maximum recommendations.
  • Use a high-quality oil since less expensive grease or generic brands might cost you more in the long run.
  • Engine manufacturers do not recommend the use of synthetic oils.  Find more information on Exmark’s YouTube channel at www.youtube.com/exmarkmanufacturing.
  • You have the option of using Exmark-branded engine oil, which is specifically formulated for mowers.

Did you find this post helpful? Leave us a comment below.

Mid-season mower maintenance

Monday, August 30th, 2010

Now that mowing season is well under way, the last thing you want to happen is for your mower to experience downtime. The following tips will help you keep your mower running in tip-top shape.

  • Check your operator’s manual to see what might need to be greased!  Keeping the right parts greased is an important step in extending the life of your mower.
  • Check the air filter (inner and outer) and change it if necessary.  Never use compressed air to clean a filter.
  • Depending on how many hours the mower has been running, consider changing the fuel filter.
  • Check and, if necessary, change the spark plugs.
  • Verify that you are doing the oil changes at the proper intervals.  You should NEVER exceed the manufacturer’s recommendations by more than 100 hours.
  • Blow the debris off the unit
    • Remove the belt deck belt shields and blow off all foreign material.
    • Blow the grass off the areas around the pumps and wheel motors (overheated oil leads to shorter component life).
    • Blow through the openings in and around the console or remove the console mounting screws to get debris out of this area.
    • Check for loose hardware.
    • Verify torque on wheel motor castle nut and tire mounting lug nuts.

How is your season going? If you have any comments or questions, we’d love to hear from you.